Private Docs (RAG/Tools) - 45 minutes
1. Goals of this lab
Parasol Insurance is looking to not only build new apps but also integrate generative AI into their existing applications, such as their customer service representative tools used to respond to customer claim emails. The goal of this lab is to integrate private data from internal documents and other data sources into the existing application, improving accuracy of the responses from the assistant AI service and ultimately improving customer satisfaction. To achieve this goal, you will:
-
Dive into advanced application integration techniques for AI, exploring how to integrate AI into applications for Parasol’s unique needs
-
Learn how to ingest and utilize private documents securely
-
Apply the Retrieval-Augmented Generation (RAG) pattern to enhance AI model output
-
Extend AI models with specialized tools and agents
-
Understand the limitations of RAG and when to consider fine-tuning
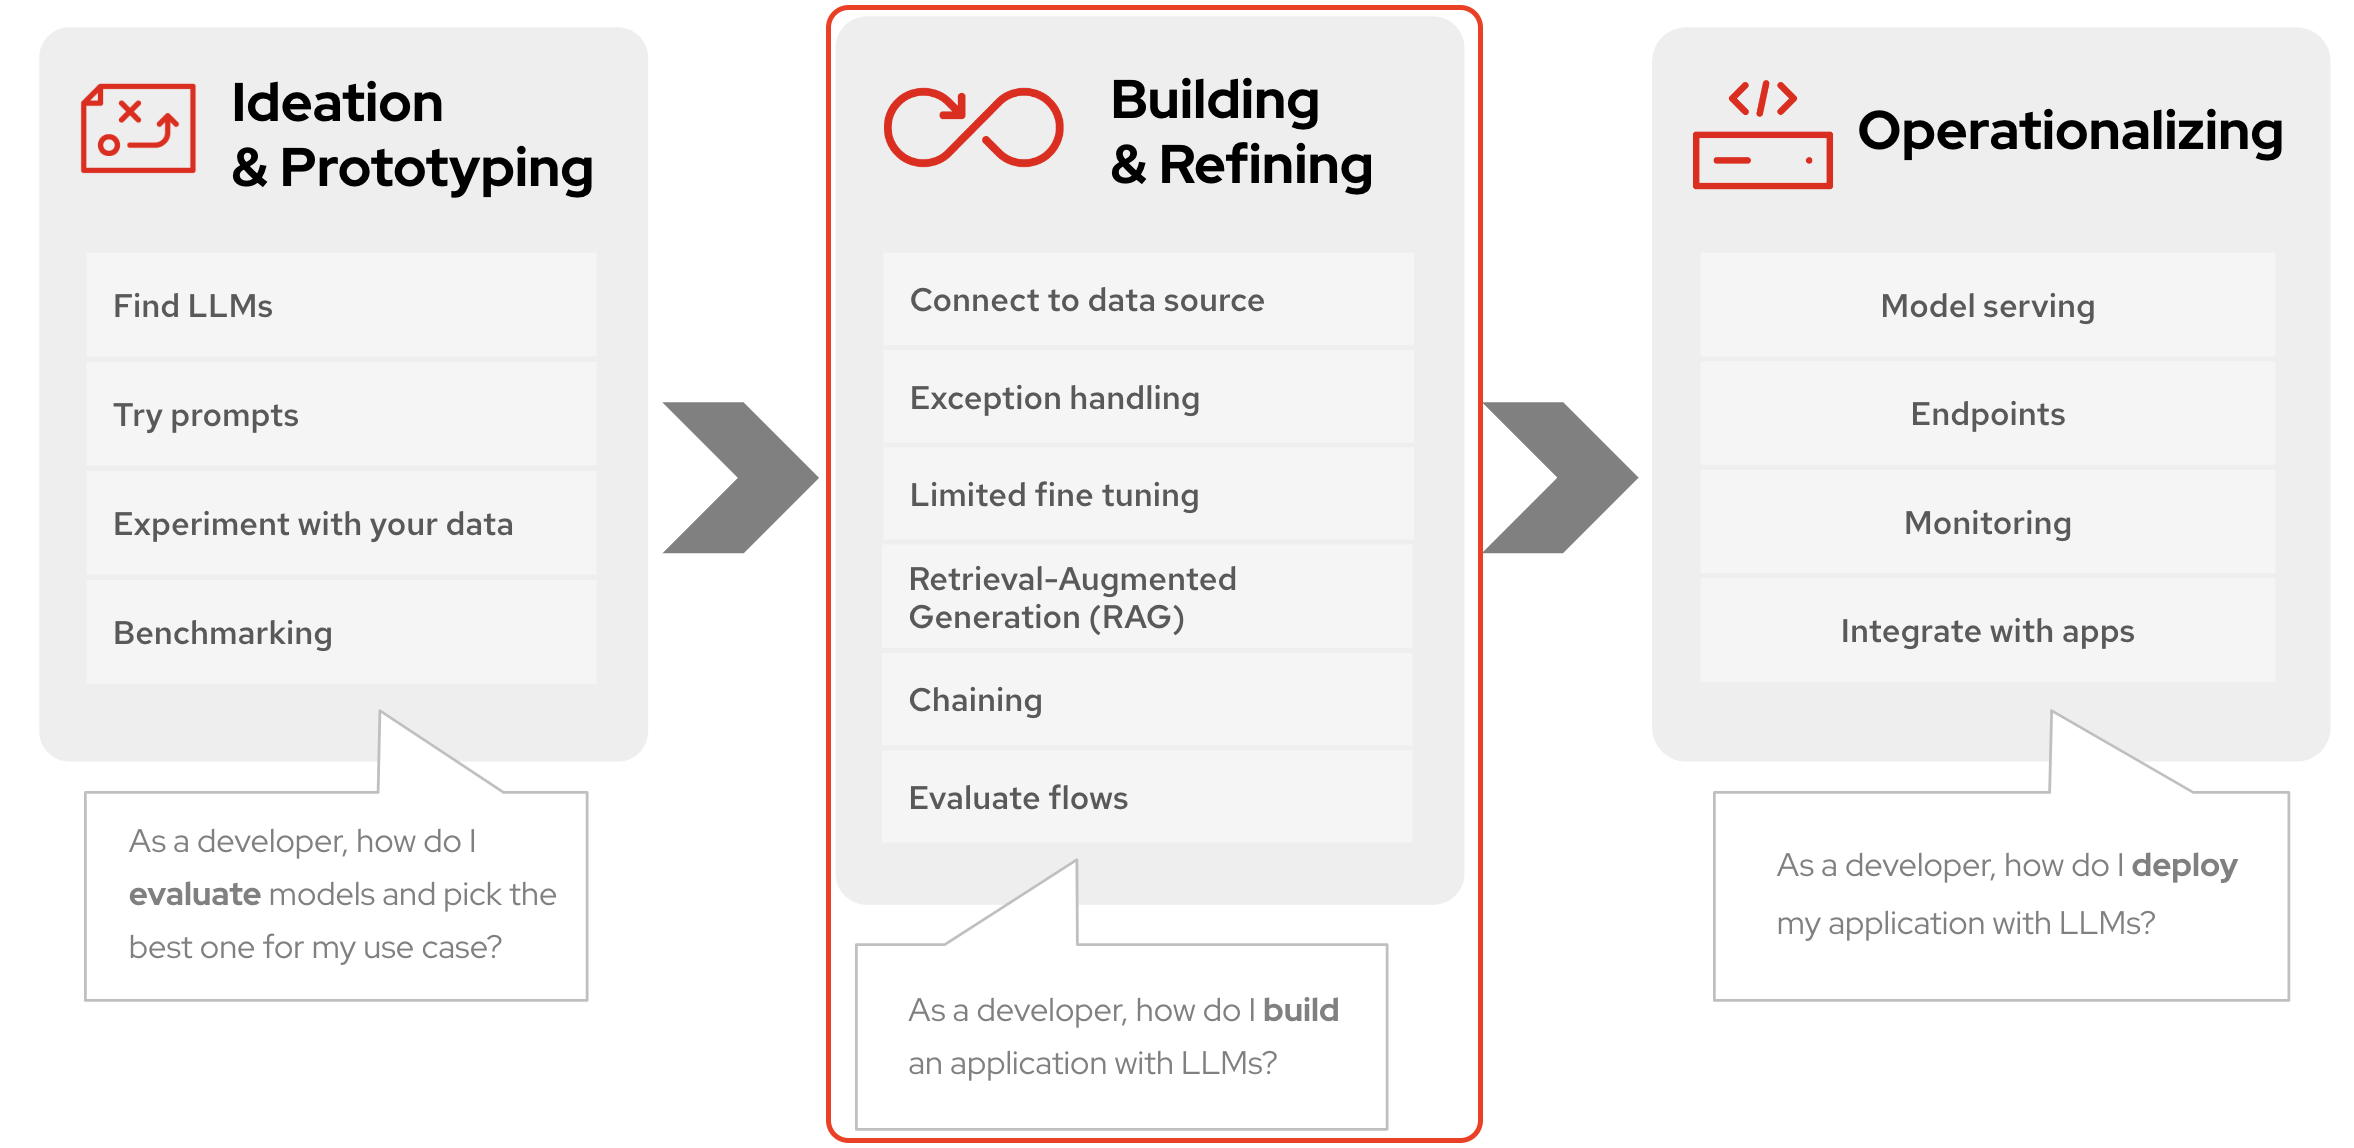
This module will focus on Building and Refining.
| If you haven’t accessed Red Hat Developer Hub and Red Hat Dev Spaces yet, complete the following sections. Otherwise, proceed to the Working in your Cloud-based Development Environment section. |
2. Deploy the existing Parasol application in Red Hat Developer Hub
Red Hat Developer Hub (RHDH) is an enterprise-grade, self-managed, and customizable developer portal built on top of Backstage.io. It’s designed to streamline the development process for organizations, specifically those using Red Hat products and services. Here’s a breakdown of its key benefits:
-
Increased Developer Productivity: Reduces time spent searching for resources and setting up environments.
-
Improved Collaboration: Provides a central platform for developers to share knowledge and best practices.
-
Reduced Cognitive Load: Minimizes the need for developers to juggle multiple tools and resources.
-
Enterprise-Grade Support: Backed by Red Hat’s support infrastructure, ensuring stability and reliability.
Red Hat Developer Hub has already been installed and configured in the workshop environment.
2.1. Access Red Hat Developer Hub
Red Hat Developer Hub integrates with Red Hat Single Sign On (RH-SSO) to enhance security and user experience for developers within an organization. By integrating with RH-SSO, developers only need to log in once to access both RHDH and other applications secured by RH-SSO. This eliminates the need to manage multiple login credentials for different developer tools and services. RH-SSO centralizes user authentication and authorization to strengthen security by ensuring only authorized users can access RHDH and other protected resources. In addition, The platform engineering team can manage user access and permissions centrally through RH-SSO, simplifying administration and reducing the risk of unauthorized access.
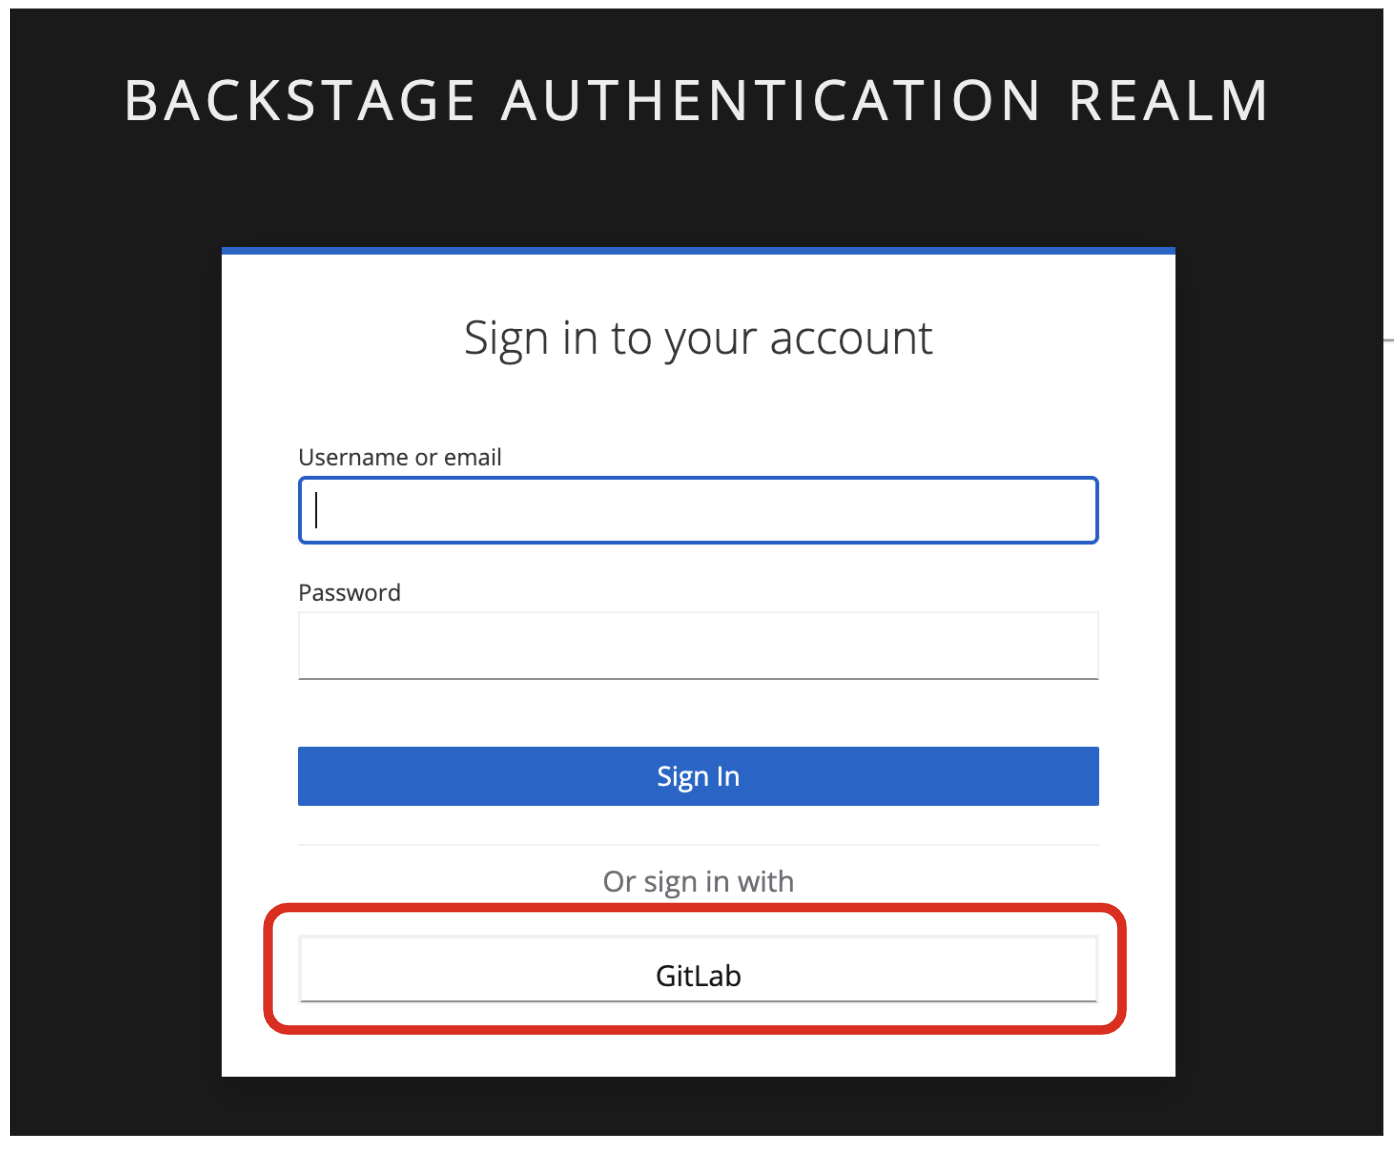
To get started, access Red Hat Developer Hub Dashboard to authenticate by GitLab.
Choose the GitLab option.
Enter the following credential in the Gitlab login page.
-
Username:
user1-
Password:
openshift
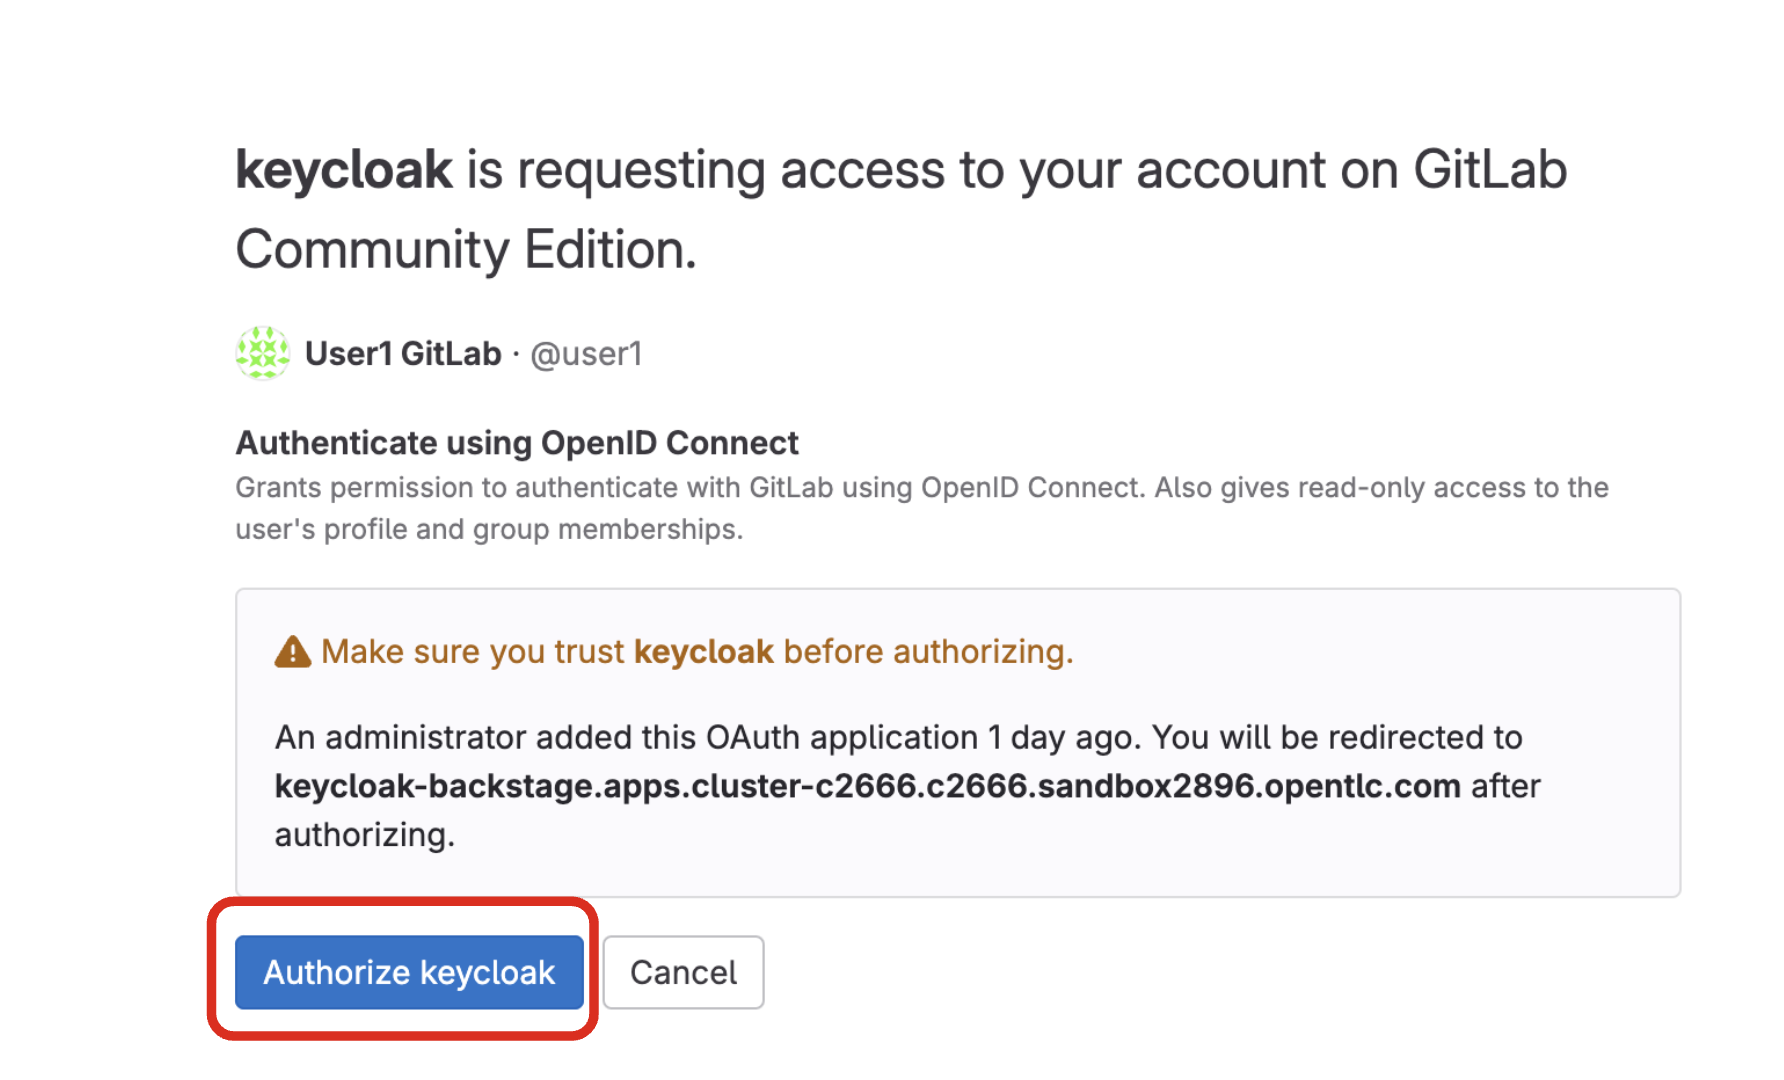
Click Authorize Keycloak to allow the authentication to proceed.
Find more information about the Red Hat Developer Hub here.
2.2. Use software templates to deploy the Parasol Customer Service App
In Red Hat Developer Hub, a software template serves as a pre-configured blueprint for creating development environments and infrastructure. Software templates streamline the process of setting up development environments by encapsulating pre-defined configurations. This saves developers time and effort compared to manually configuring everything from scratch.
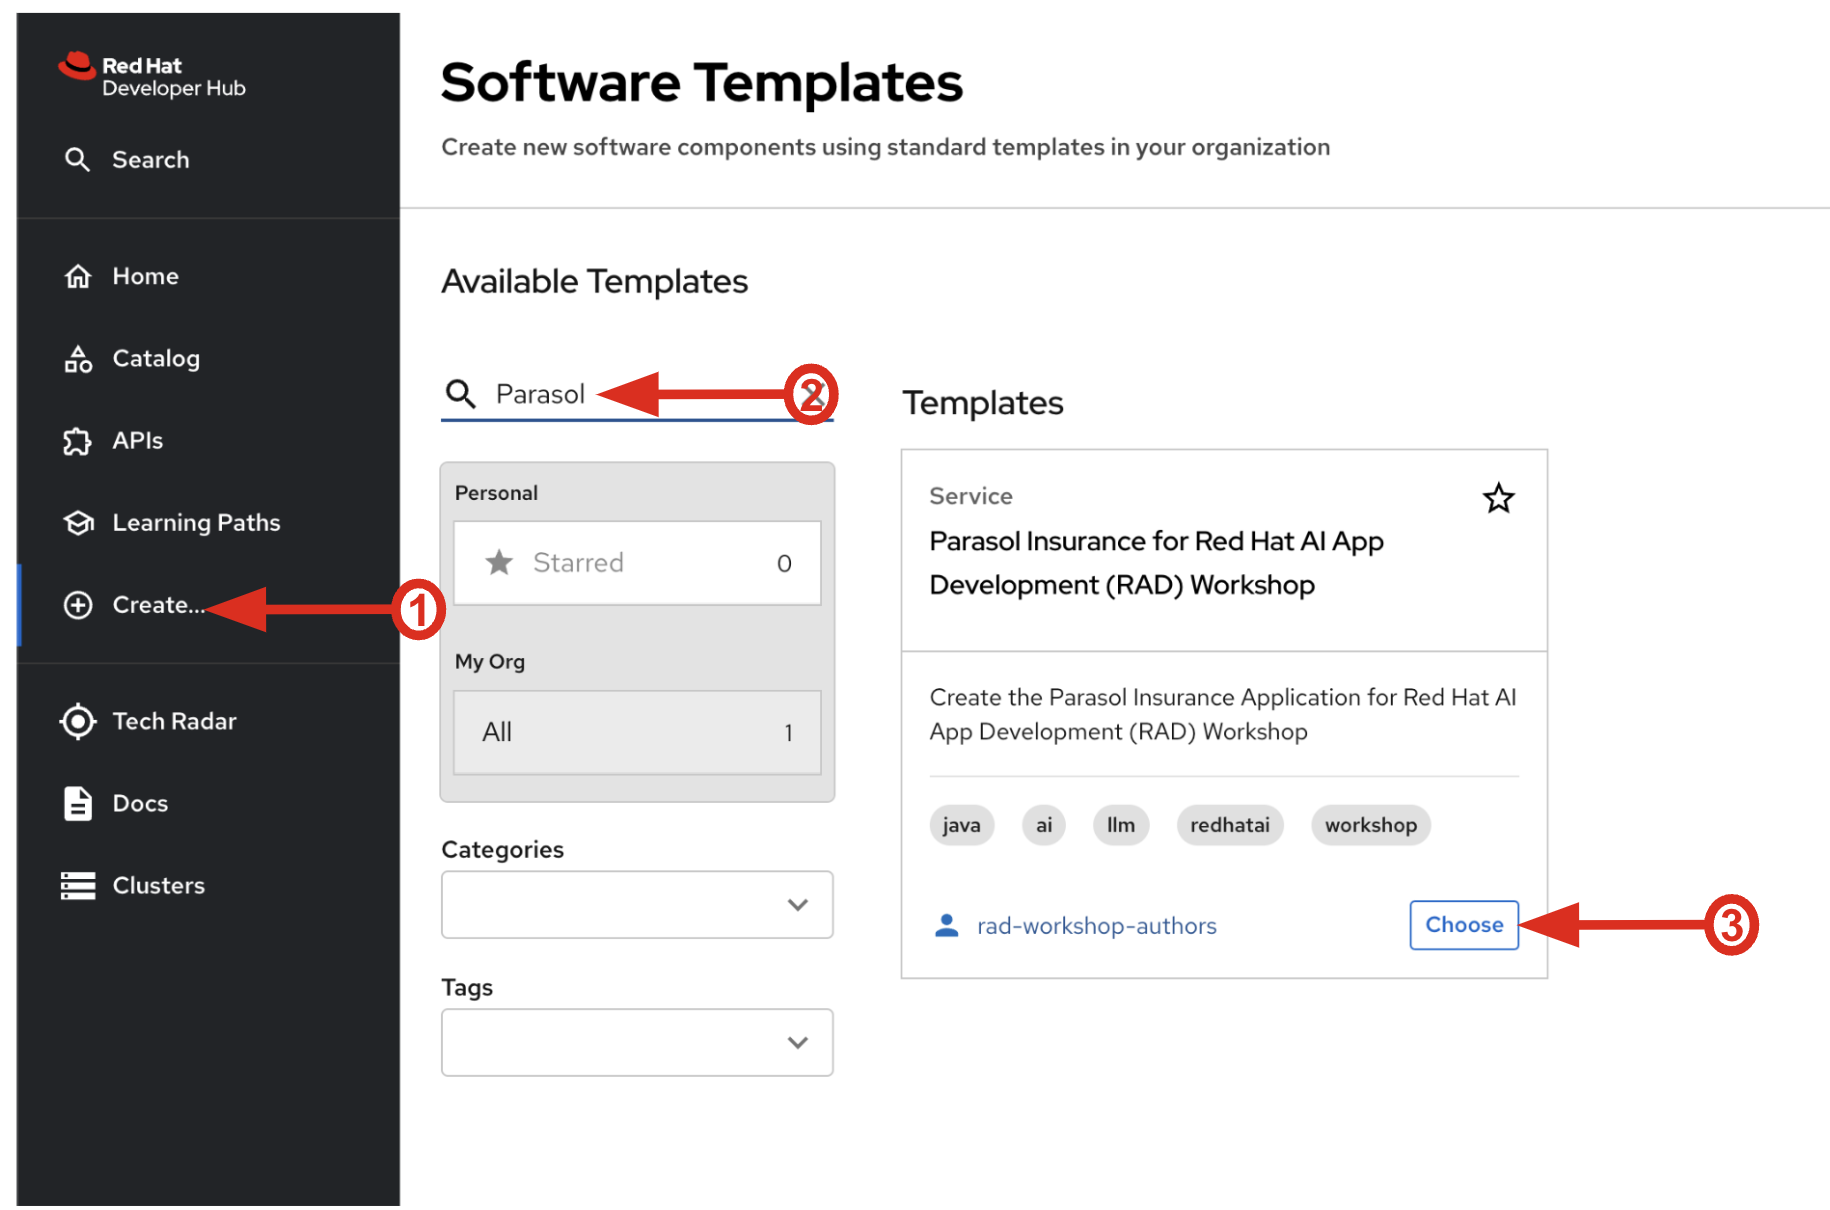
Click on Create… on the left menu. Then, type Parasol in the search bar. Then, Choose the Parasol Insurance for Red Hat AI App Development (RAD) Workshop template.
Follow the next steps to create a component based on the pre-defined Software Templates:
2.2.1. Provide Information for Application
-
Name: The name of the component. Replace the Name with the following domain:
parasol-app-user1-
Group Id: Maven Group Id. (leave this as-is)
-
Artifact Id: Maven Artifact Id. (leave this as-is)
-
Java Package Name: Name for the java package. (e.g.
org.redhat.janus- leave this as-is)
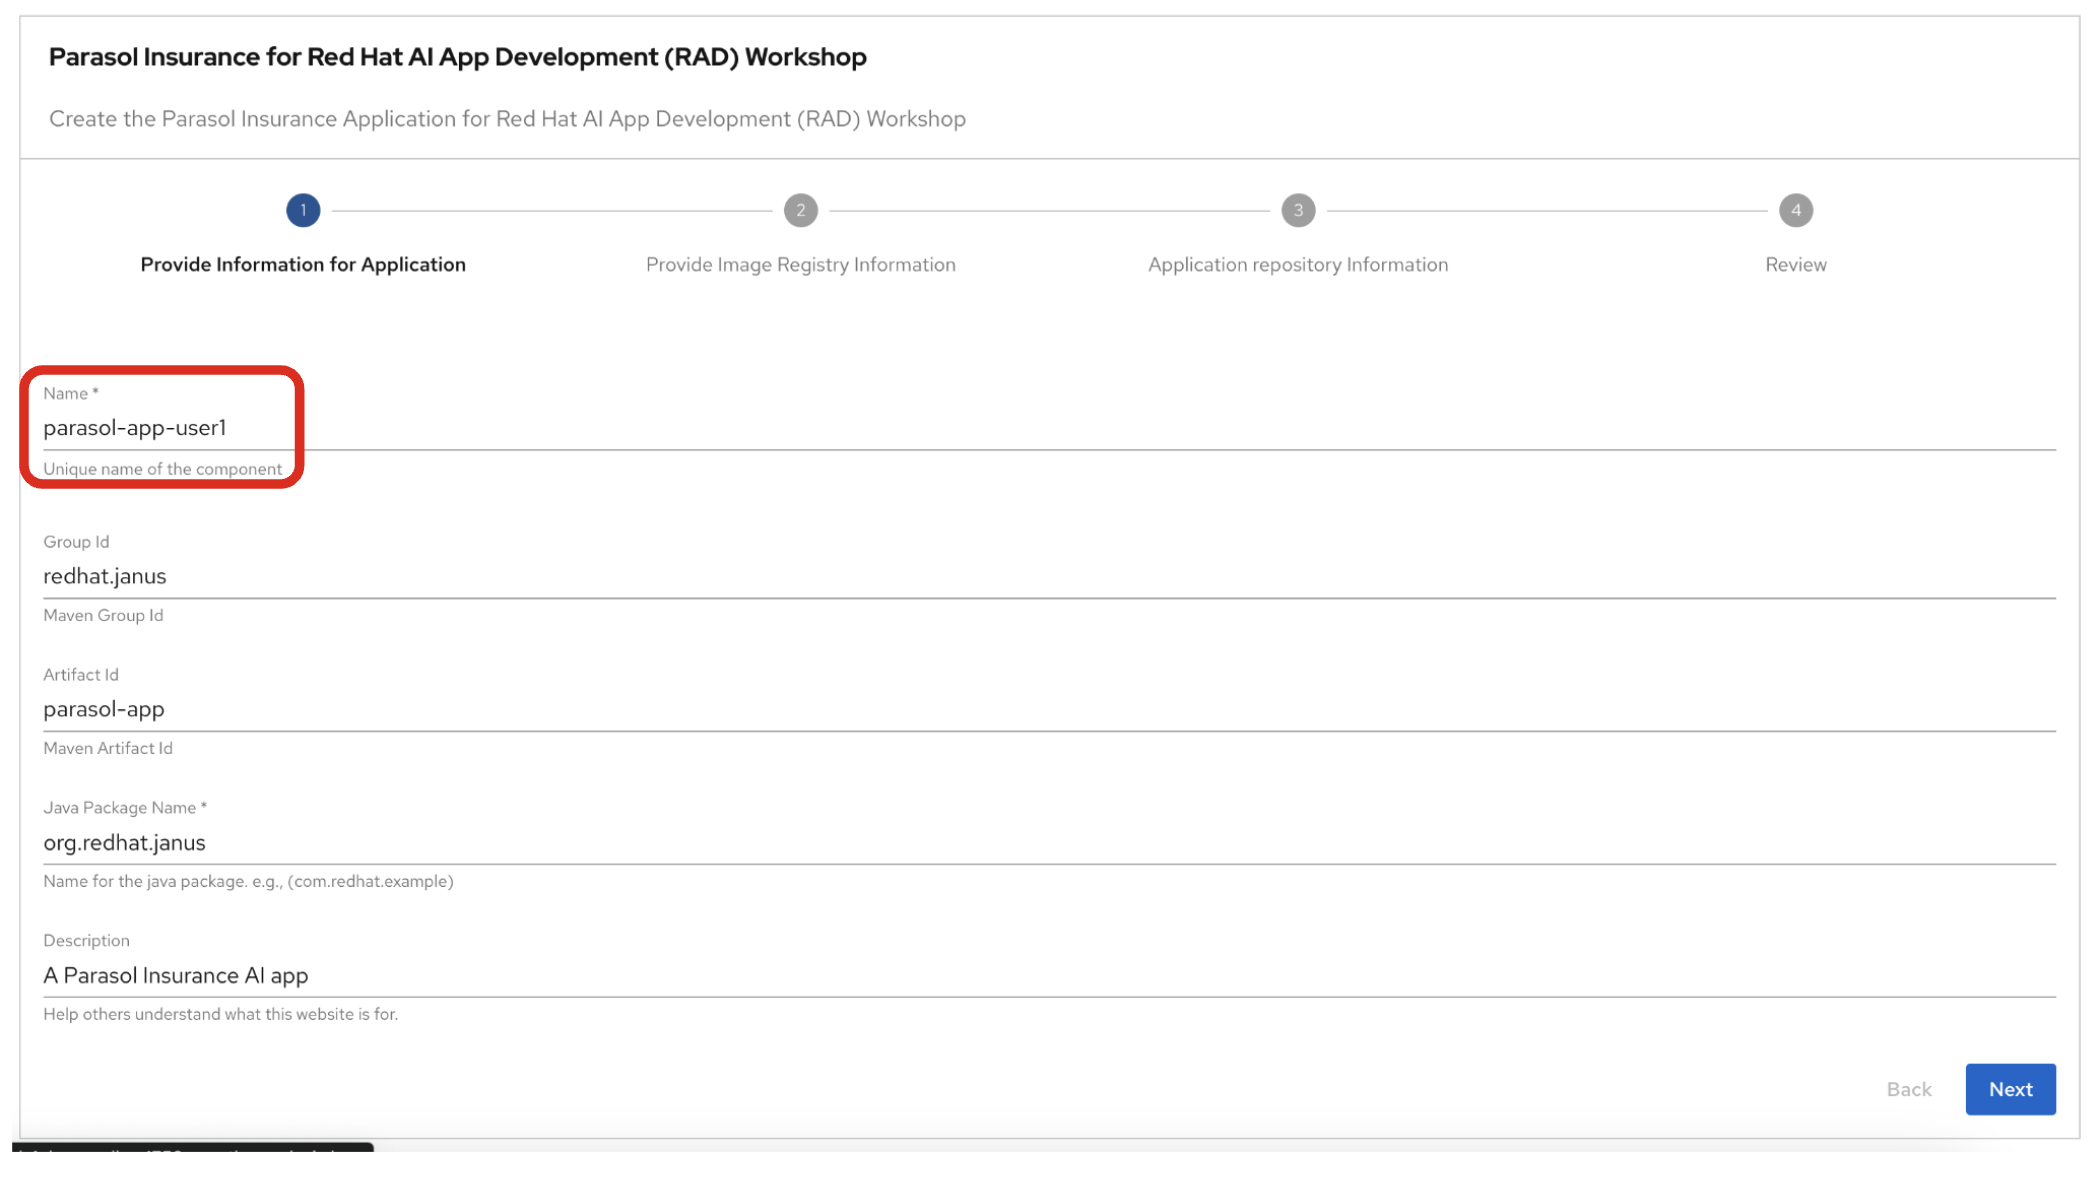
Click on Next.

3. Observe the application overview
You have just created the Parasol application with Red Hat Developer Hub. This application is used by Parasol Customer Service Representatives to enter, organize, and update existing insurance claims for its customers. An AI-powered chatbot is included for reps to use to answer questions about the claims. This chatbot is driven by an LLM that has been fine-tuned with Parasol Insurance private data, including corporate policies around insurance claims.
3.1. Open component in catalog
When all of the initialization steps are successful (green check mark), click Open Component in catalog.
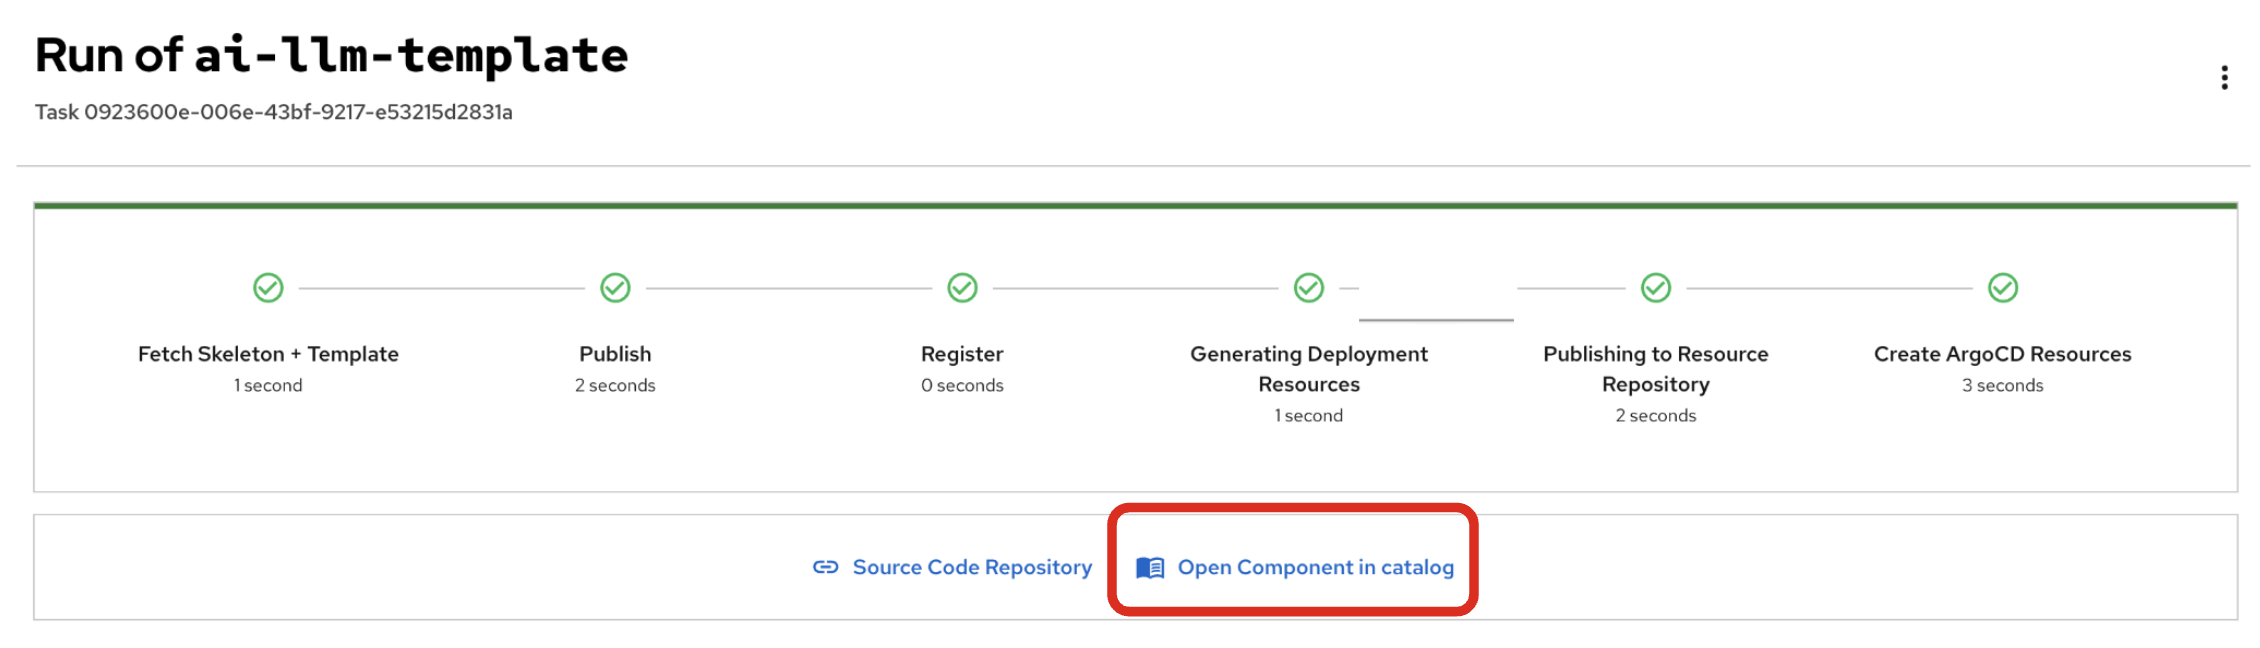
Dev Hub will open a new tab with the component information. Take a few moments to review the Deployment summary on the overview page.
| It may take a minute or two for items to appear in the Deployment summary section. |
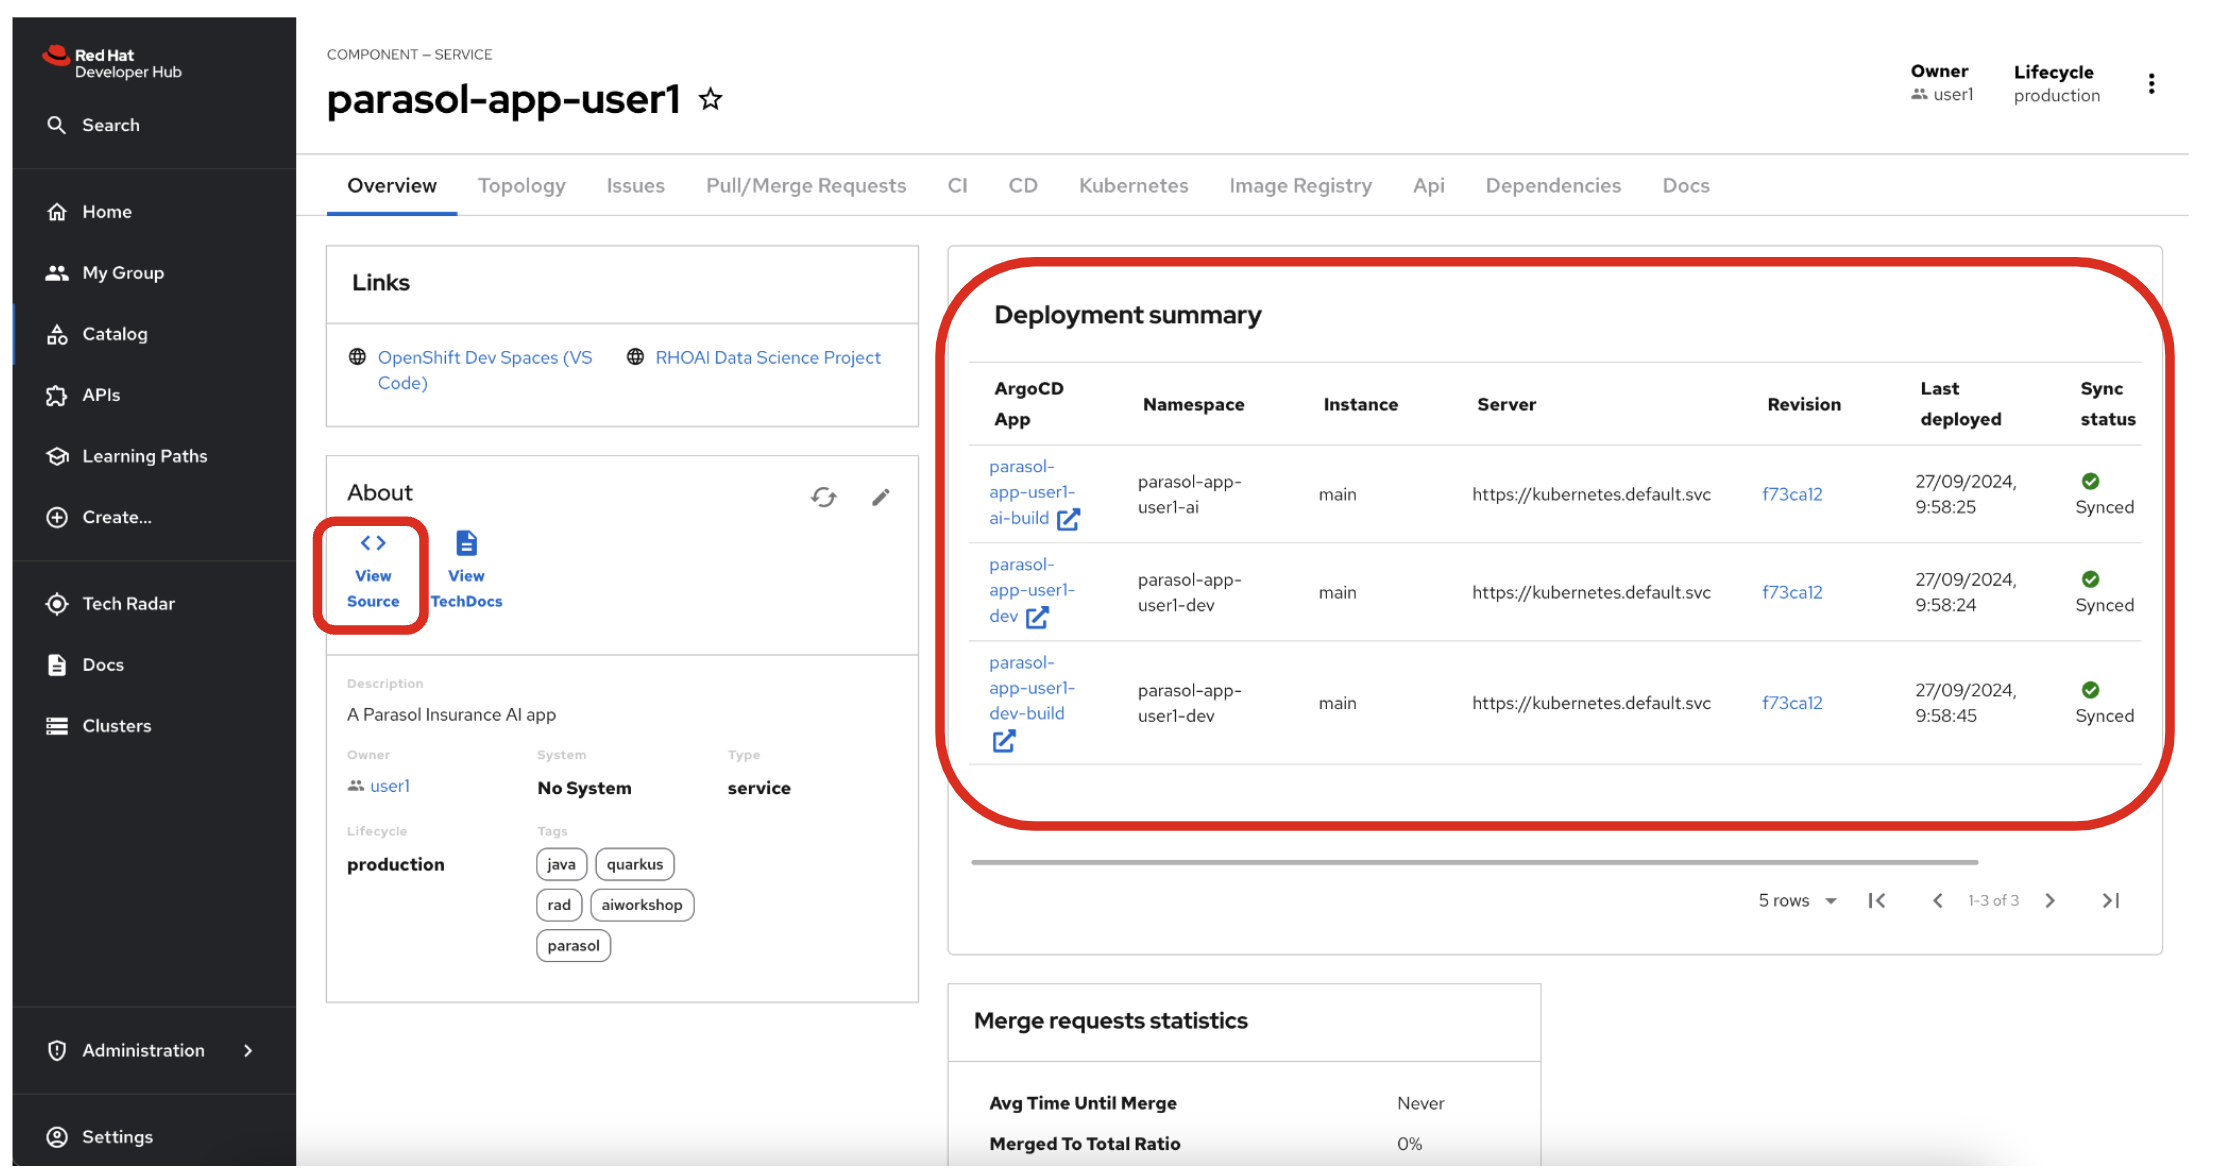
3.2. View source
Click on VIEW SOURCE to access the new source code repository created.
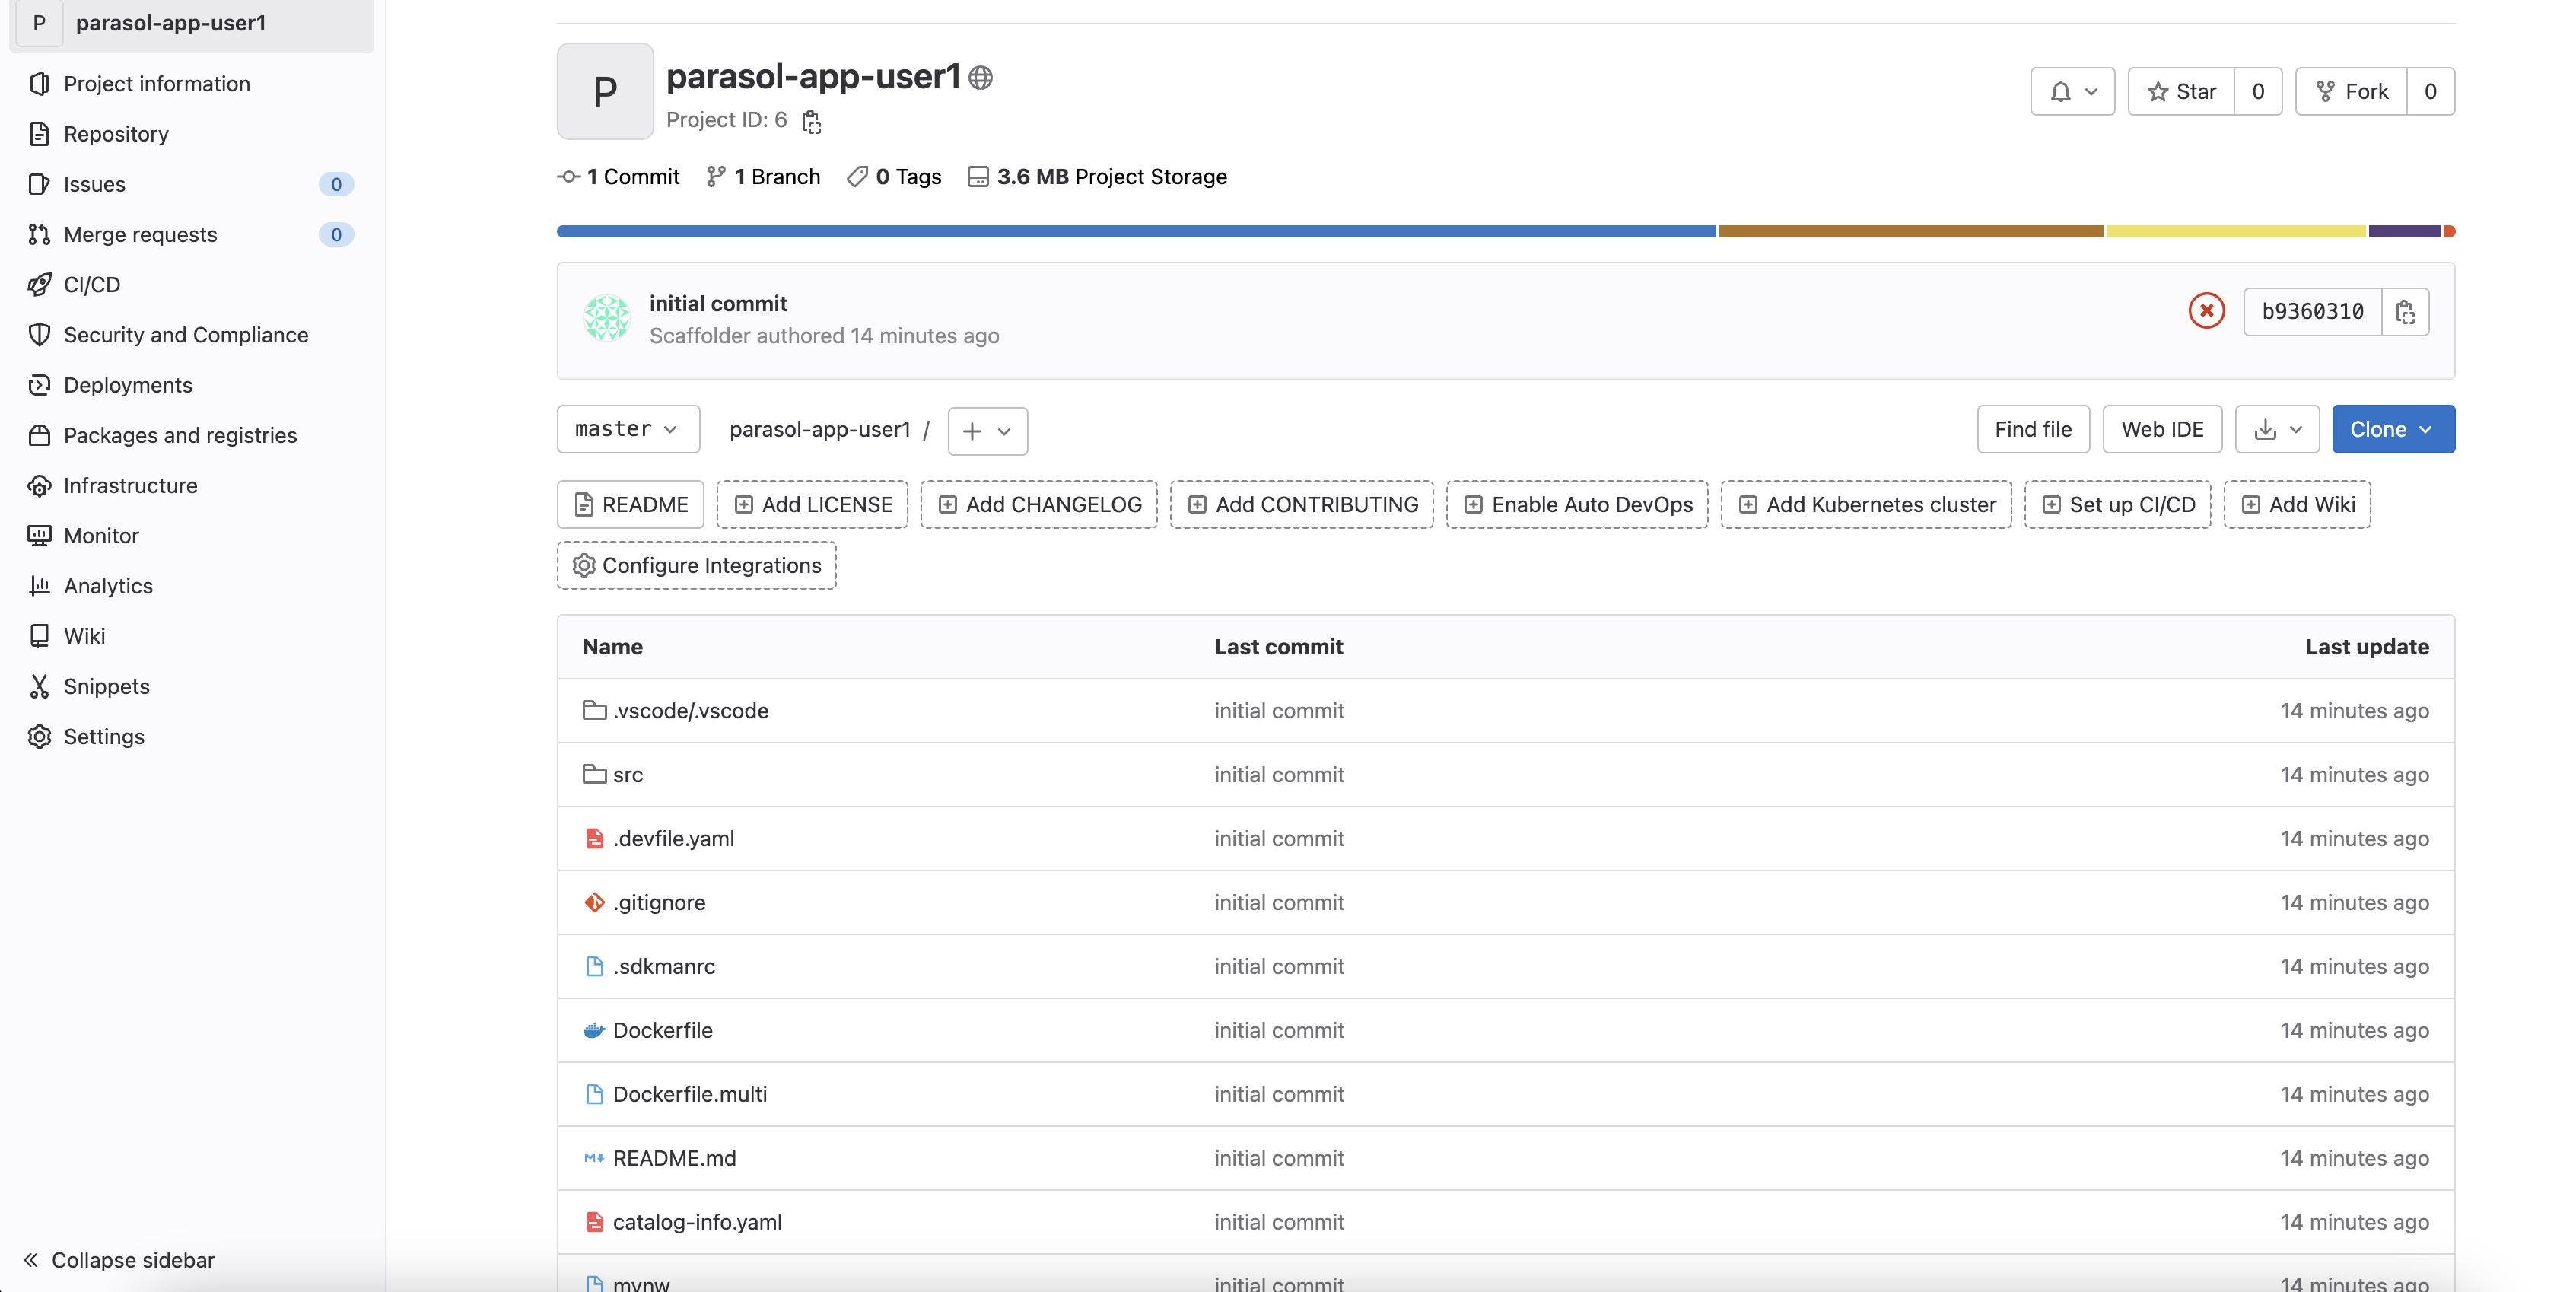
Go back to your Parasol component on Red Hat Developer Hub: Red Hat Developer Hub UI.
3.3. Review continuous integration and delivery (CI/CD)
Click on CI tab to review your pipeline information. The pipeline will be automatically triggered and run. After a few minutes, you will see the pipeline finished as Succeeded.
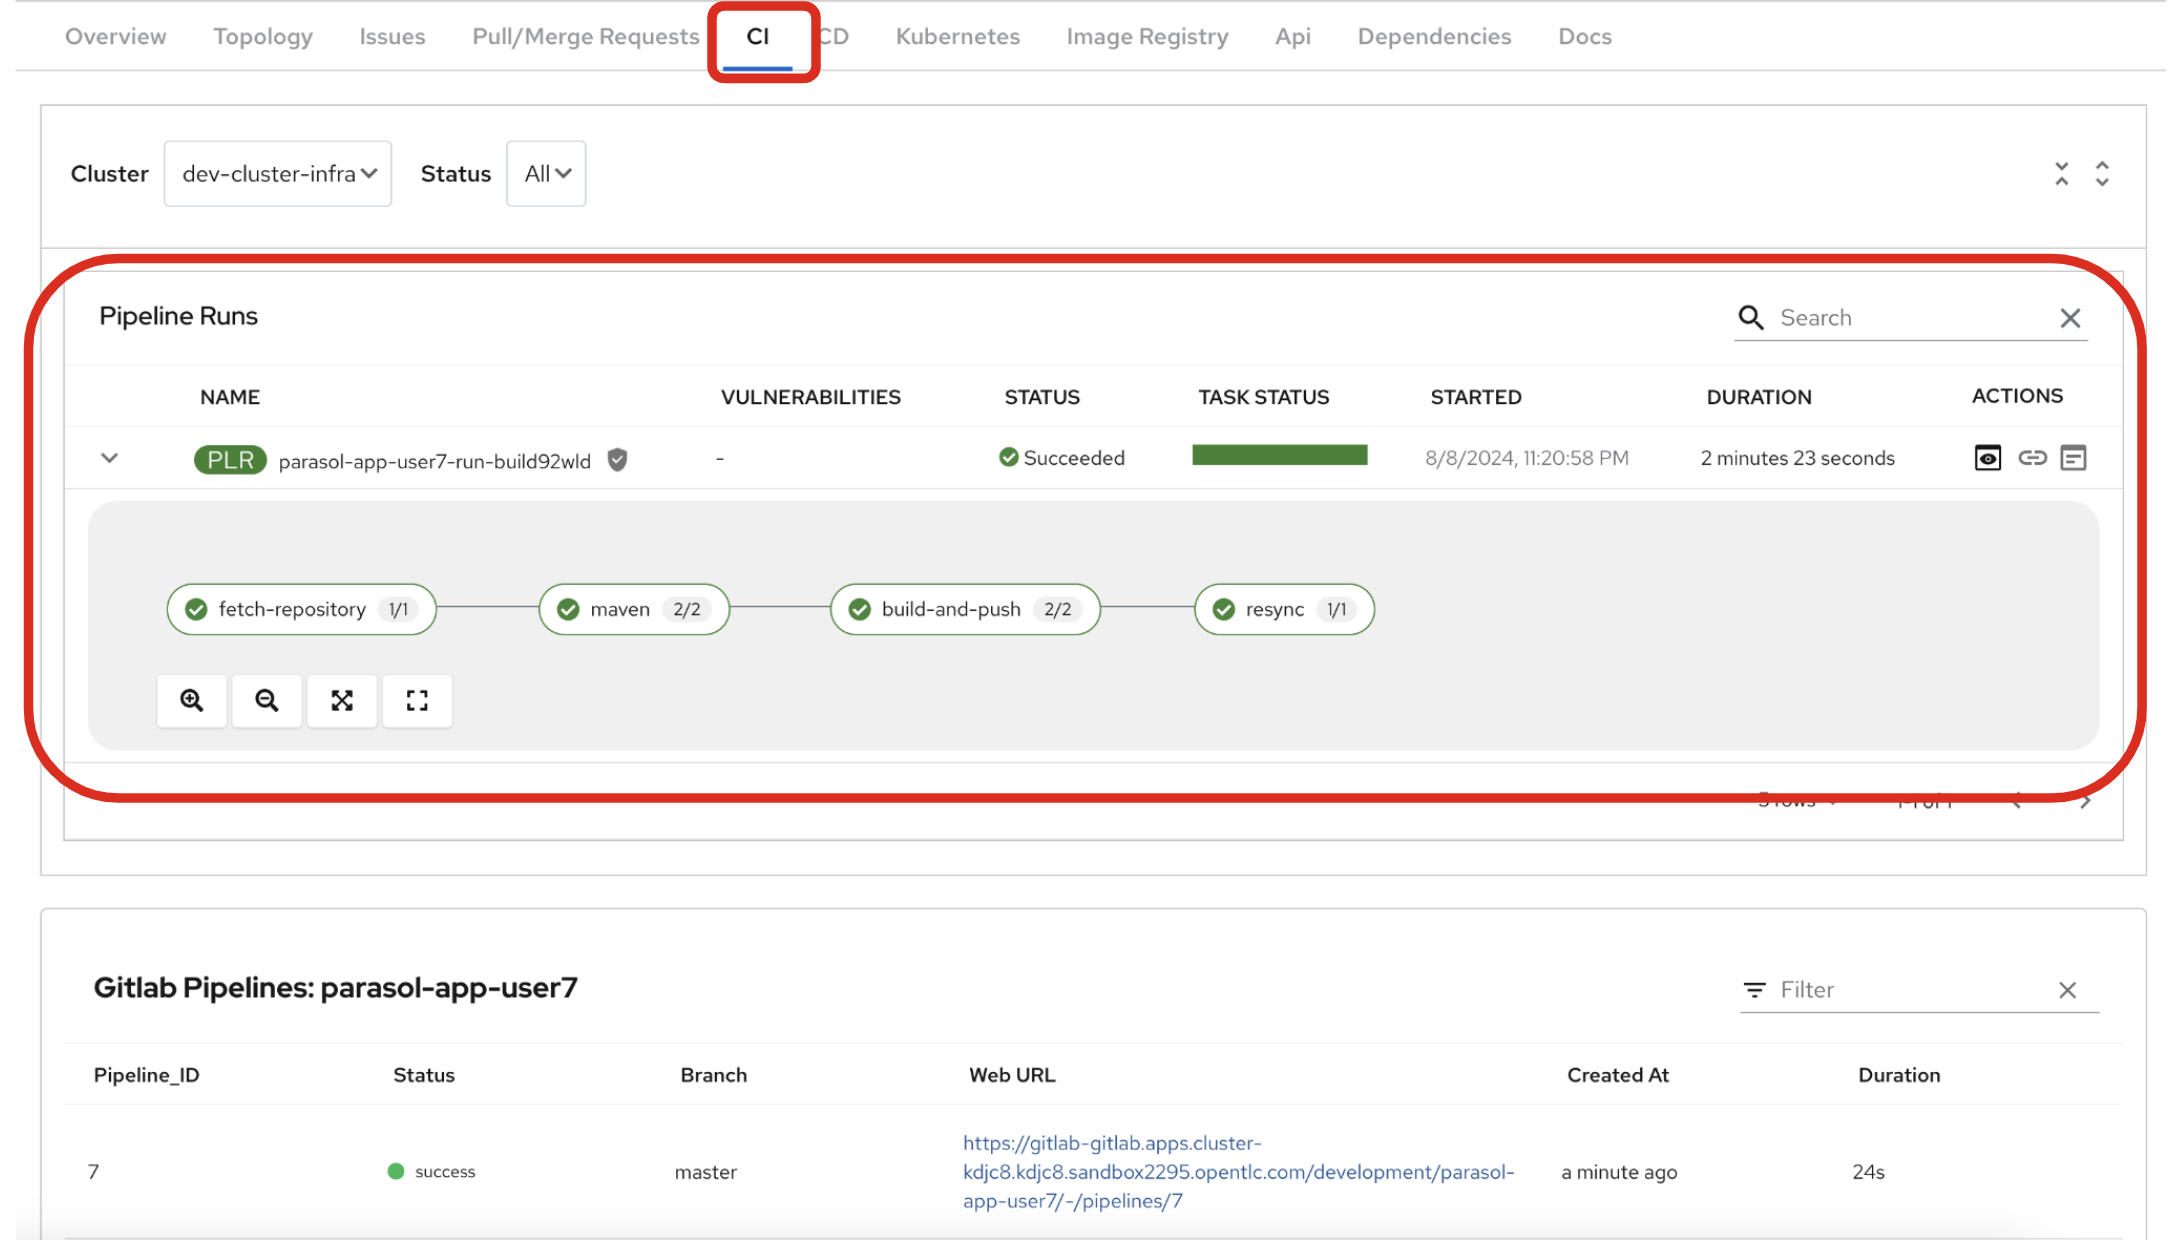
Click on CD to review ArgoCD History.
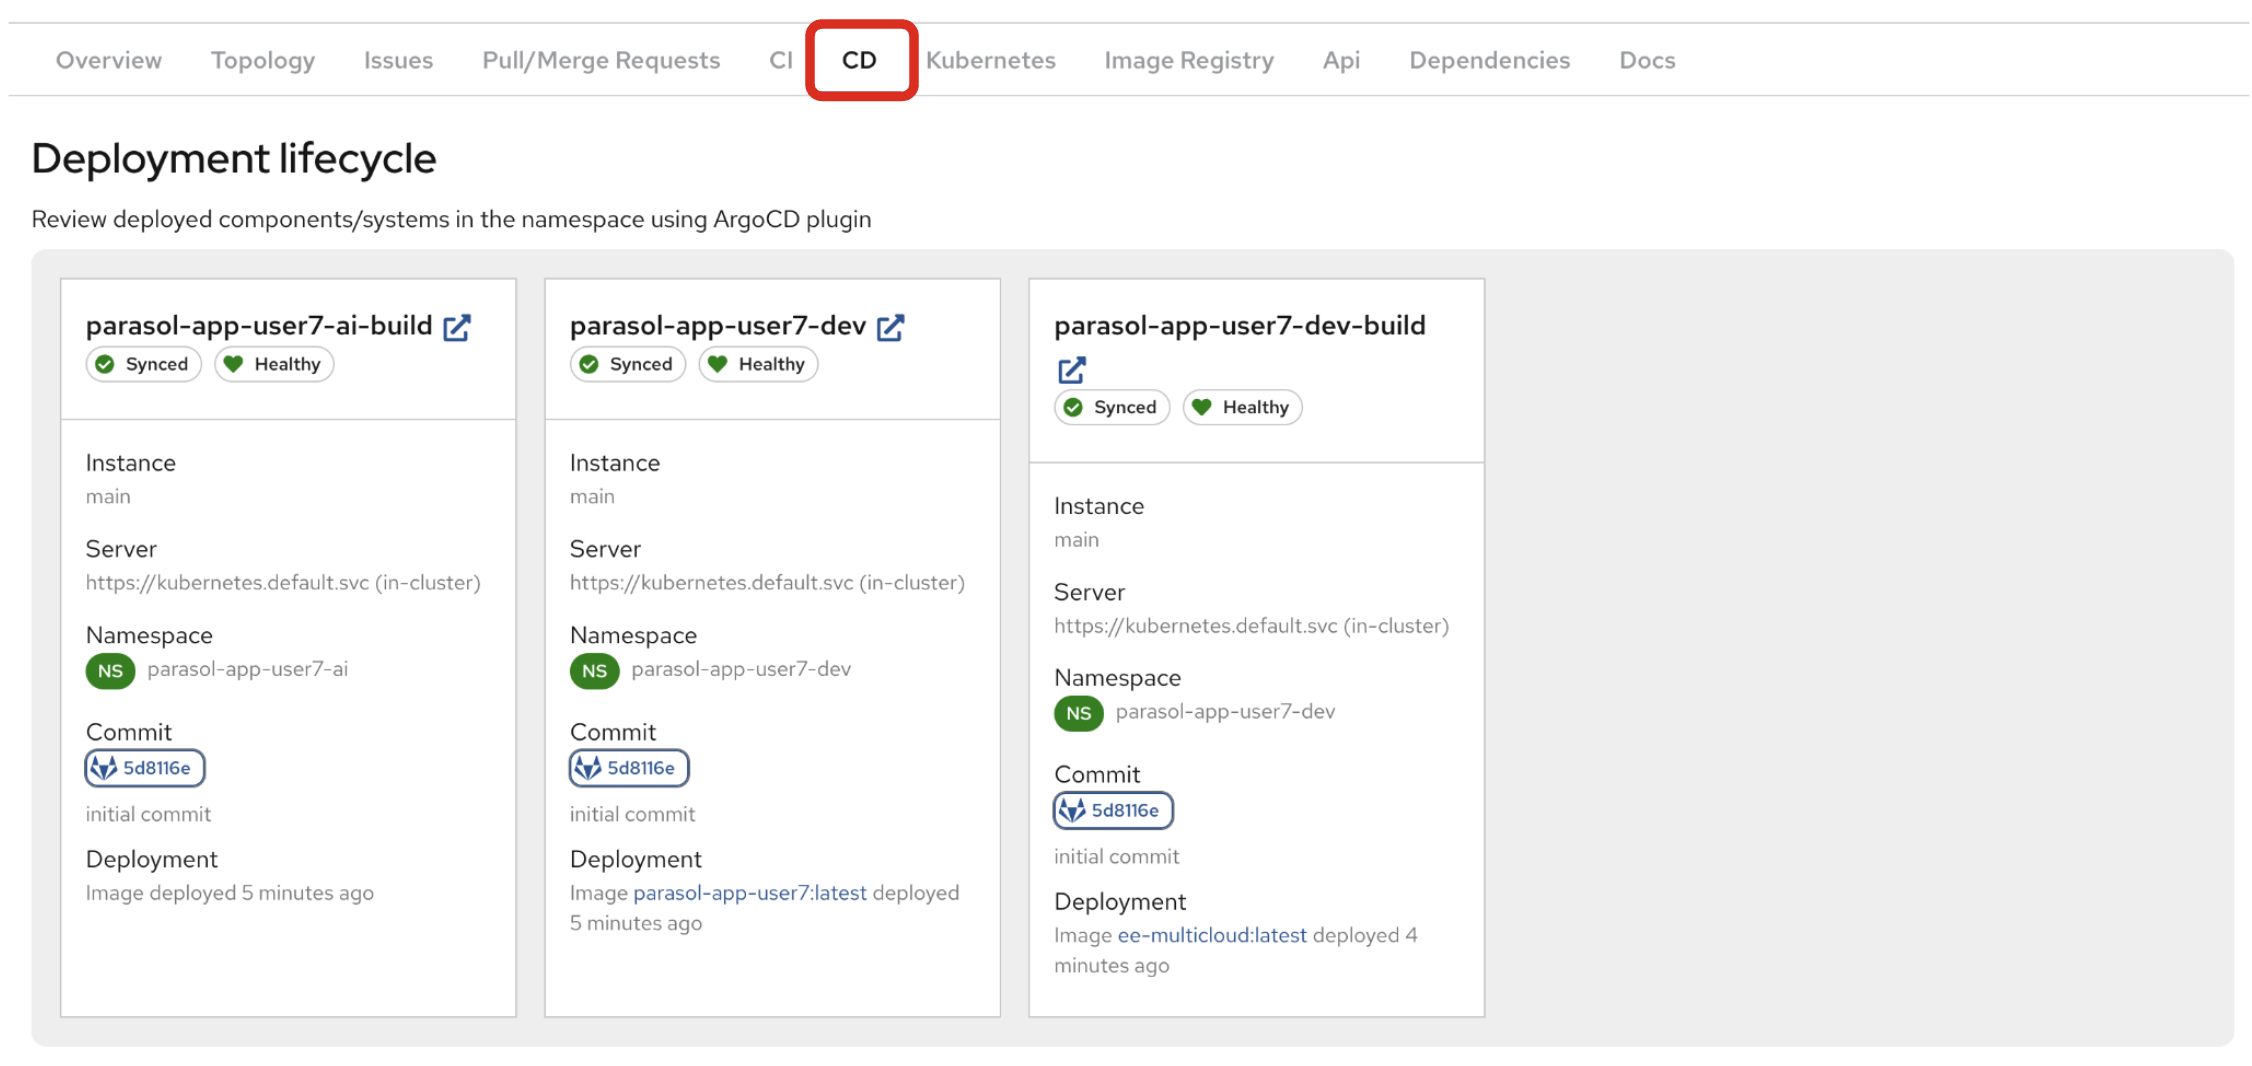
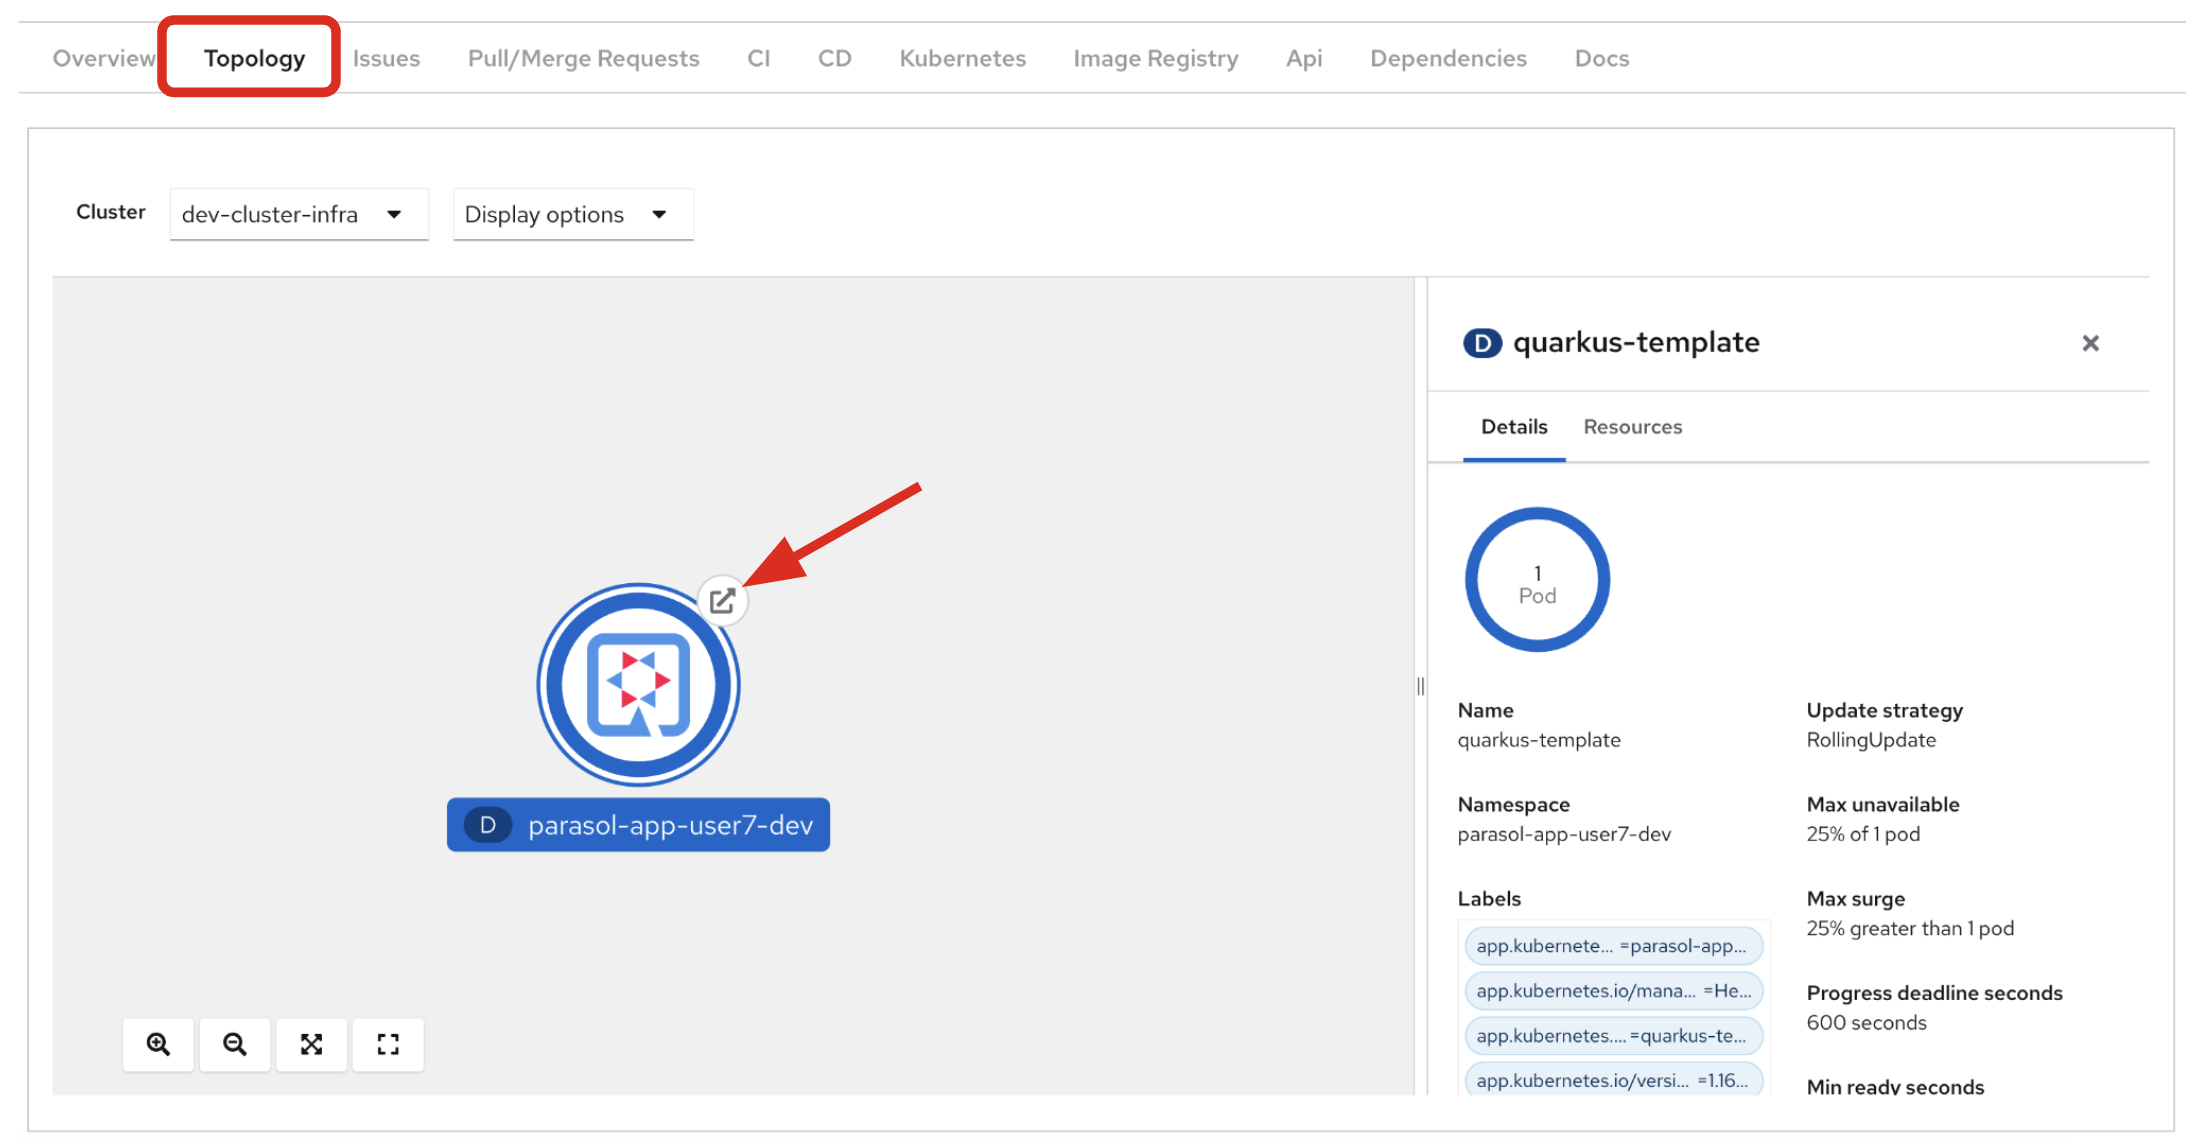
Click on TOPOLOGY to review your deployment status. Then, you will see the deployment parasol-app-user1 in the Topology.
If the deployment shows up as red, make sure to wait until the Pipeline Run on the CI tab completes successfully.
|
3.4. Verify the deployment
Access the Parasol web page to verify everything is working as expected.
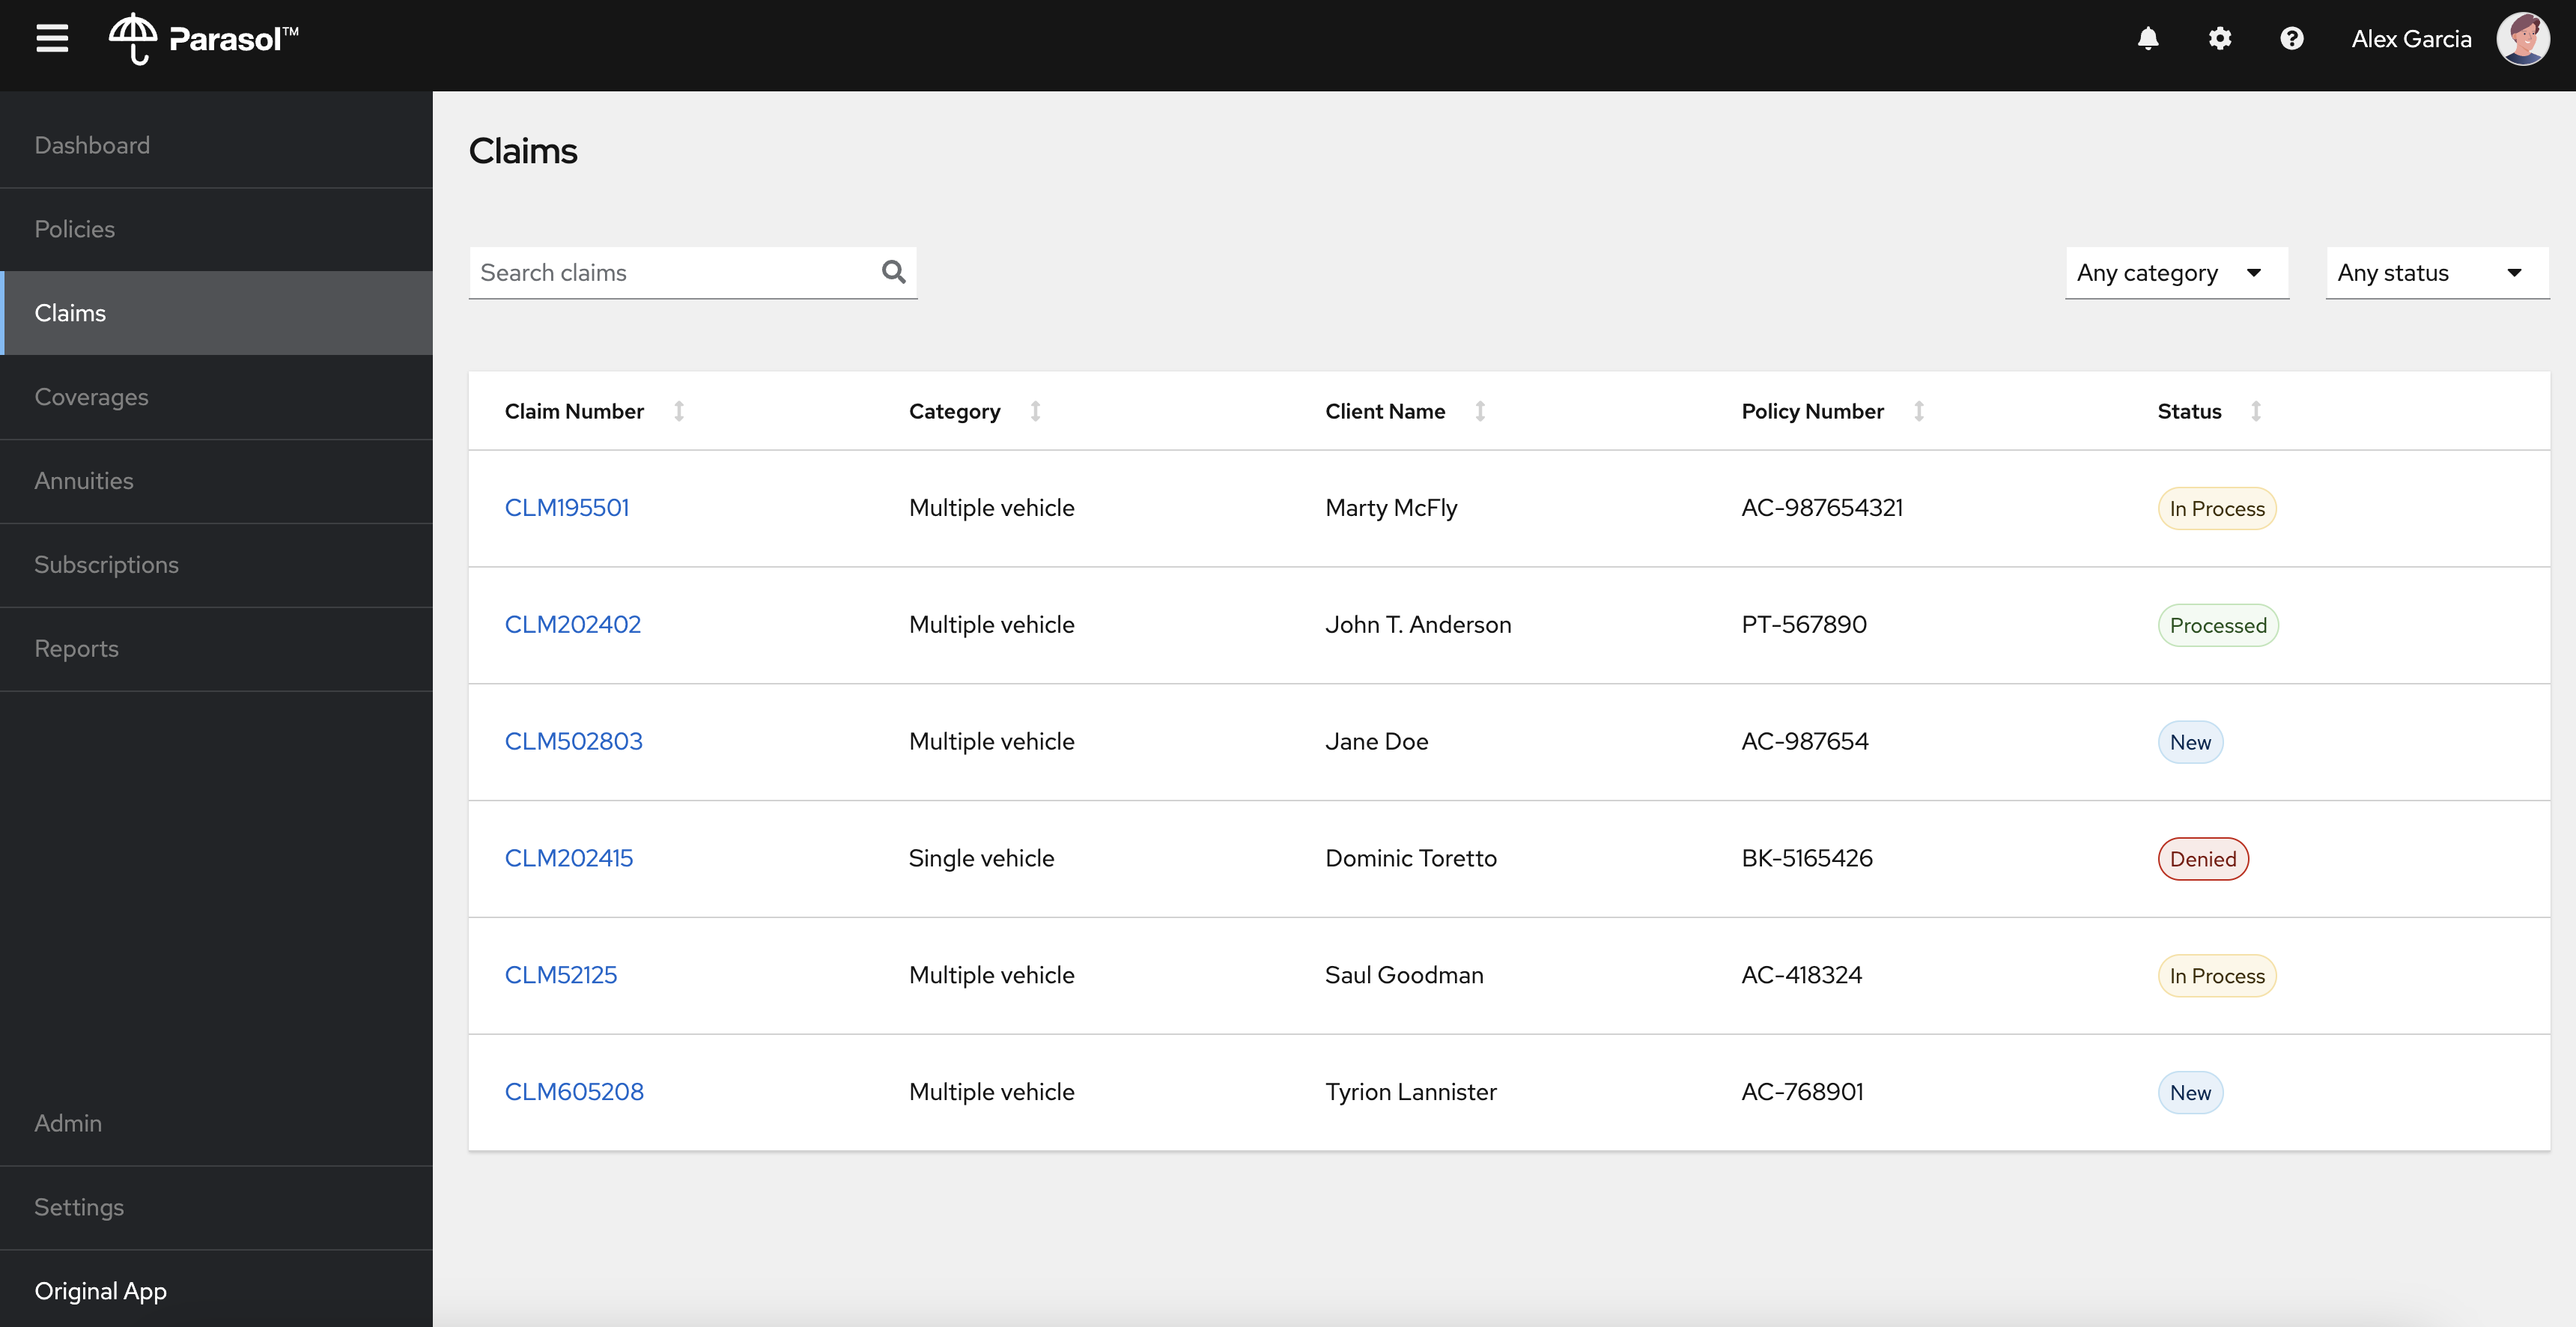
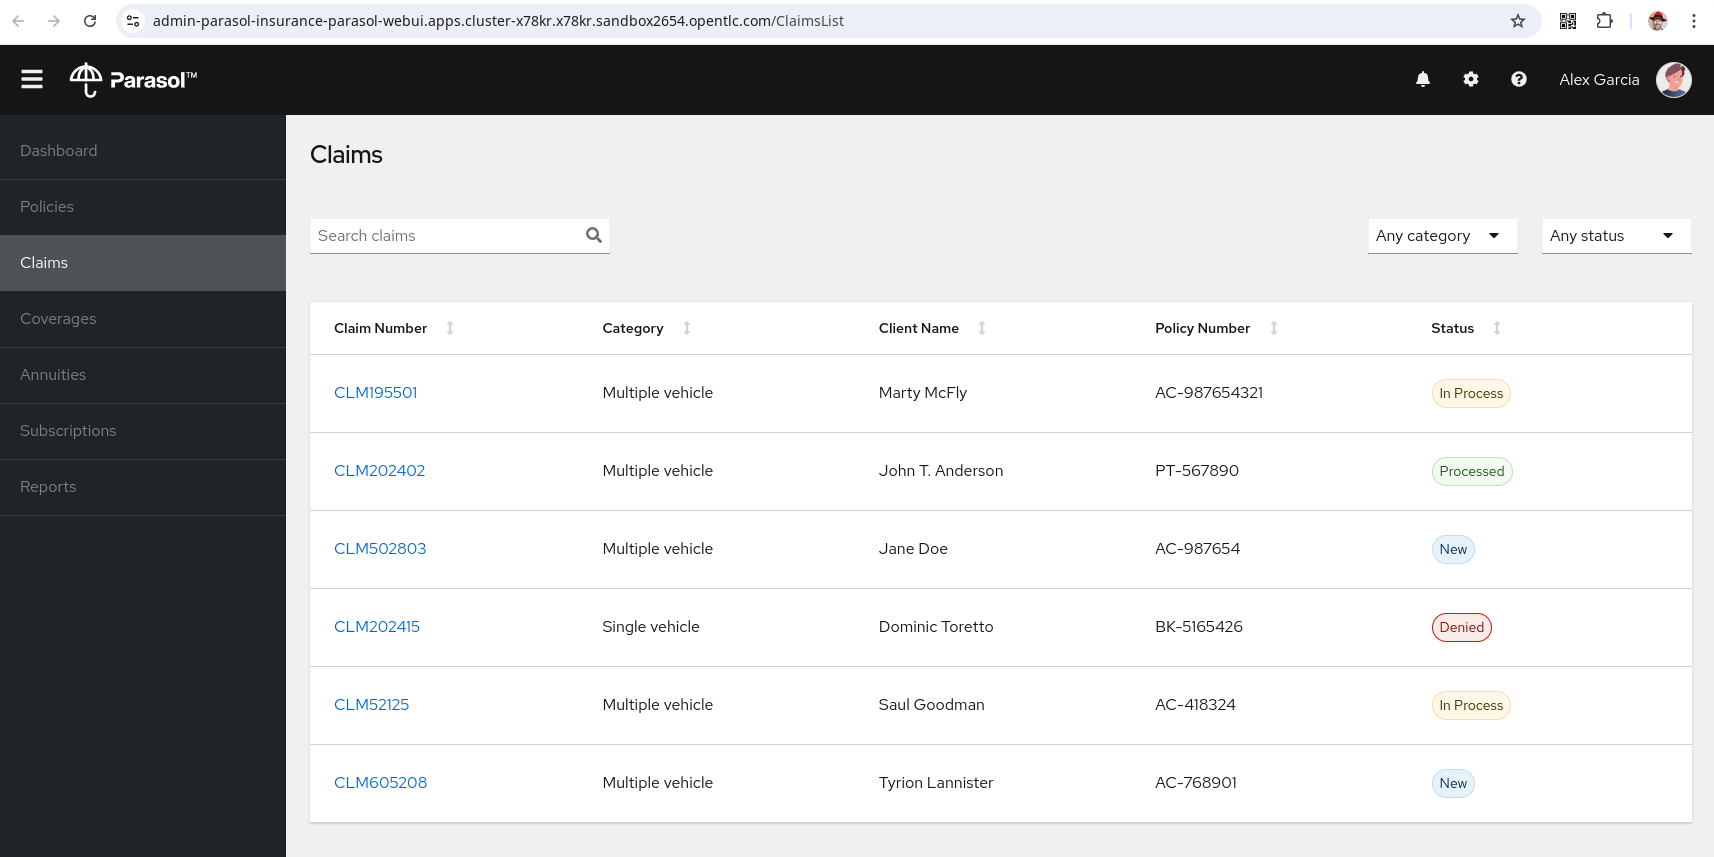
3.4.1. Explore the Parasol application
Select the claim number, CLM195501 to view the claim details such as summary, documents, etc.
Click on the Chatbot icon on the right bottom to open the chatbot popup.

3.4.2. Play with the AI chatbot
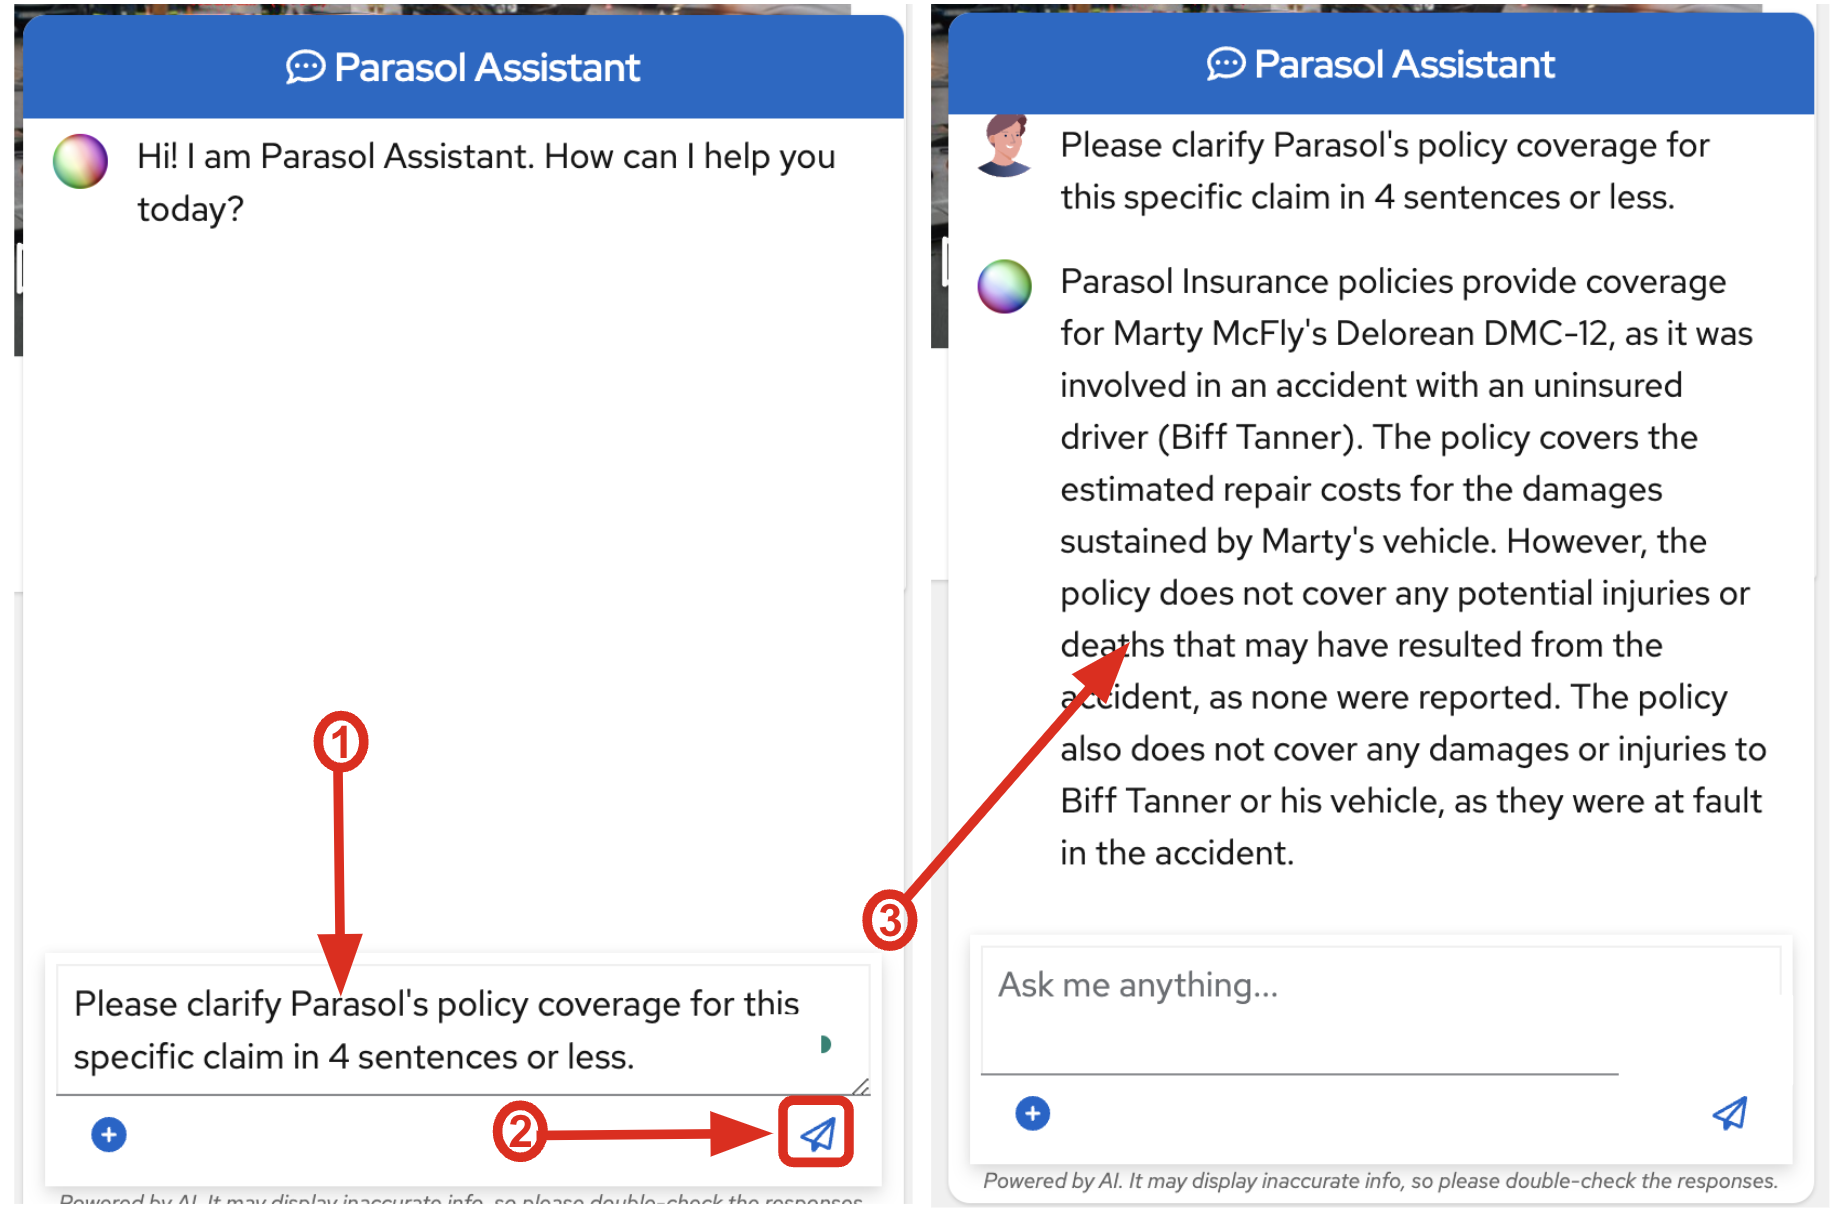
As a Parasol customer service representative, try to ask any questions about the claim to the AI chatbot. For example, you can ask if the policy is still covered or not for this car incident.
Please clarify Parasol's policy coverage for this specific claim in 4 sentences or less.Then, click on paper airplane icon (or press Enter) to send the query. The AI chatbot will connect to the trained Parasol LLM and respond with an answer.
|
If nothing happens when you click the paper airplane icon, please refresh the page and try again. |
You will see the answer in a few seconds. The answer provided may differ from what is shown below, but in general it should include Parasol-specific policy requirements from the data that was used to train the model.
Congratulations, you’ve confirmed that the existing Parasol application works! let’s look at the insurance app and start diving in to the real business problem.
4. Log into Red Hat OpenShift Dev Spaces
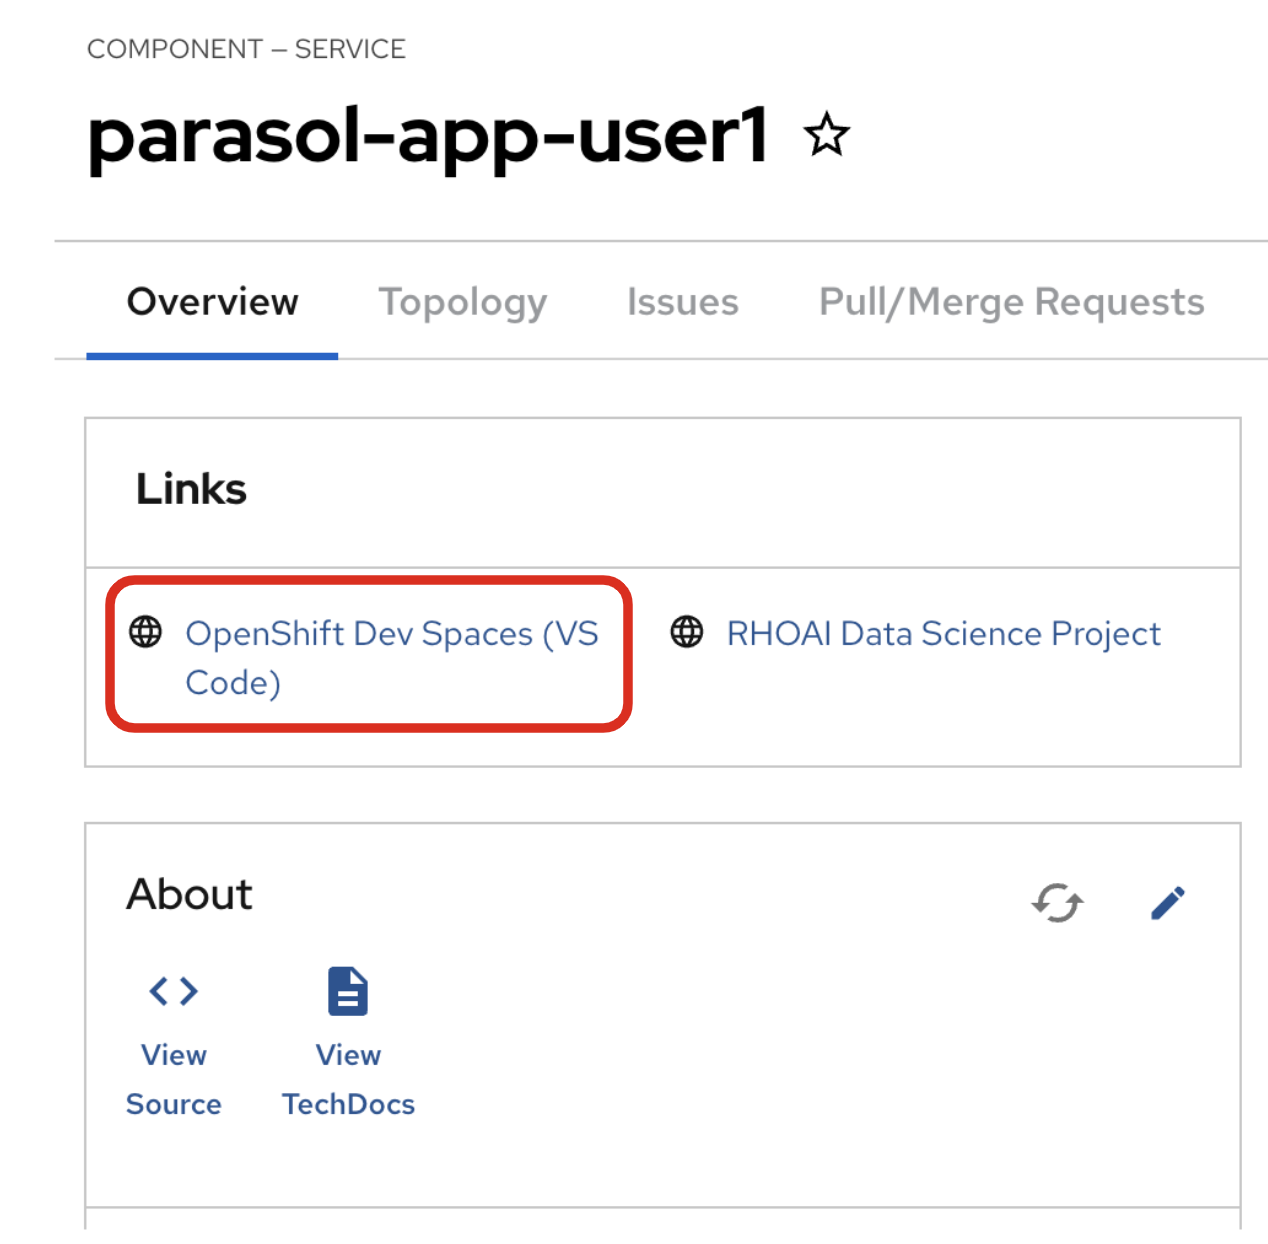
Go back to the Parasol component in Red Hat Developer Hub. From the OVERVIEW tab click on OpenShift Dev Spaces (VS Code) to make the necessary source code changes.
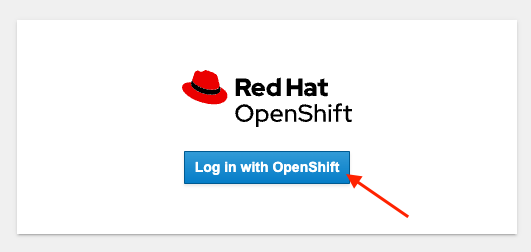
Click on Log into with OpenShift.
Log into with the following OpenShift credential on the Red Hat Single Sign-On (RH-SSO) page.
-
Username:
user1 -
Password:
openshift
|
You may need to authorize the access to DevSpaces by clicking on Allow selected permissions. If you see the following dialog, click Allow selected permissions. 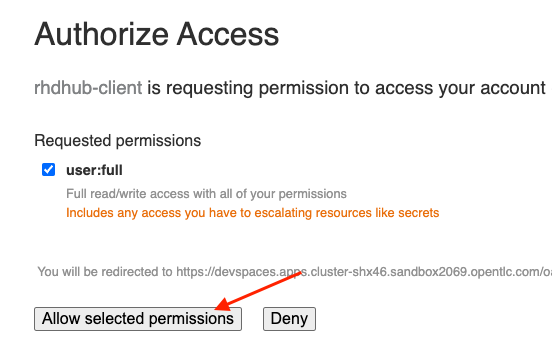
|
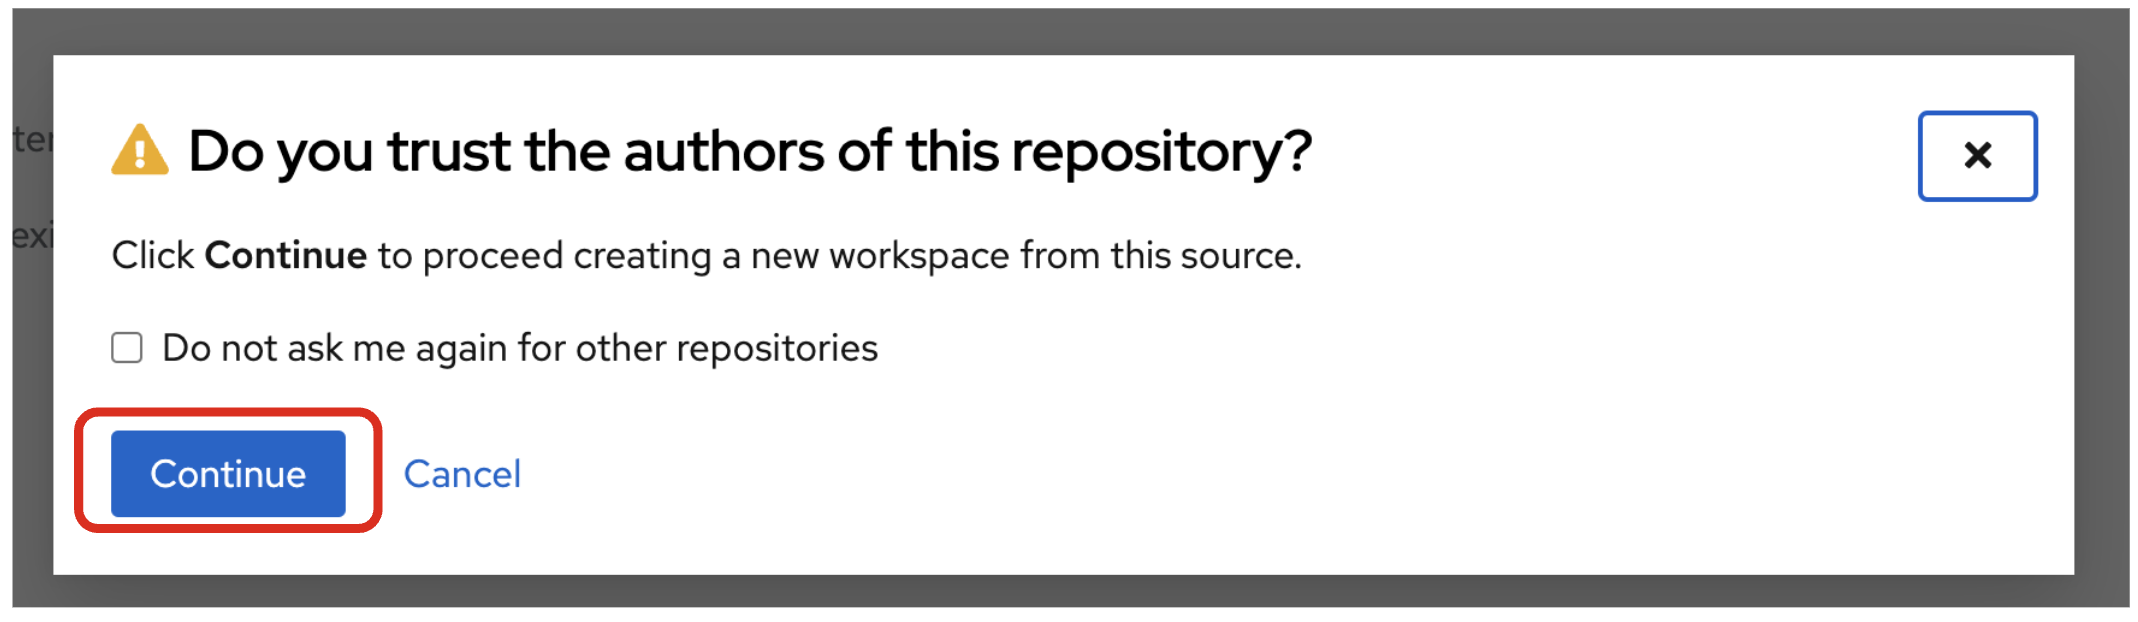
Click Continue to proceed creating a new workspace from this source.
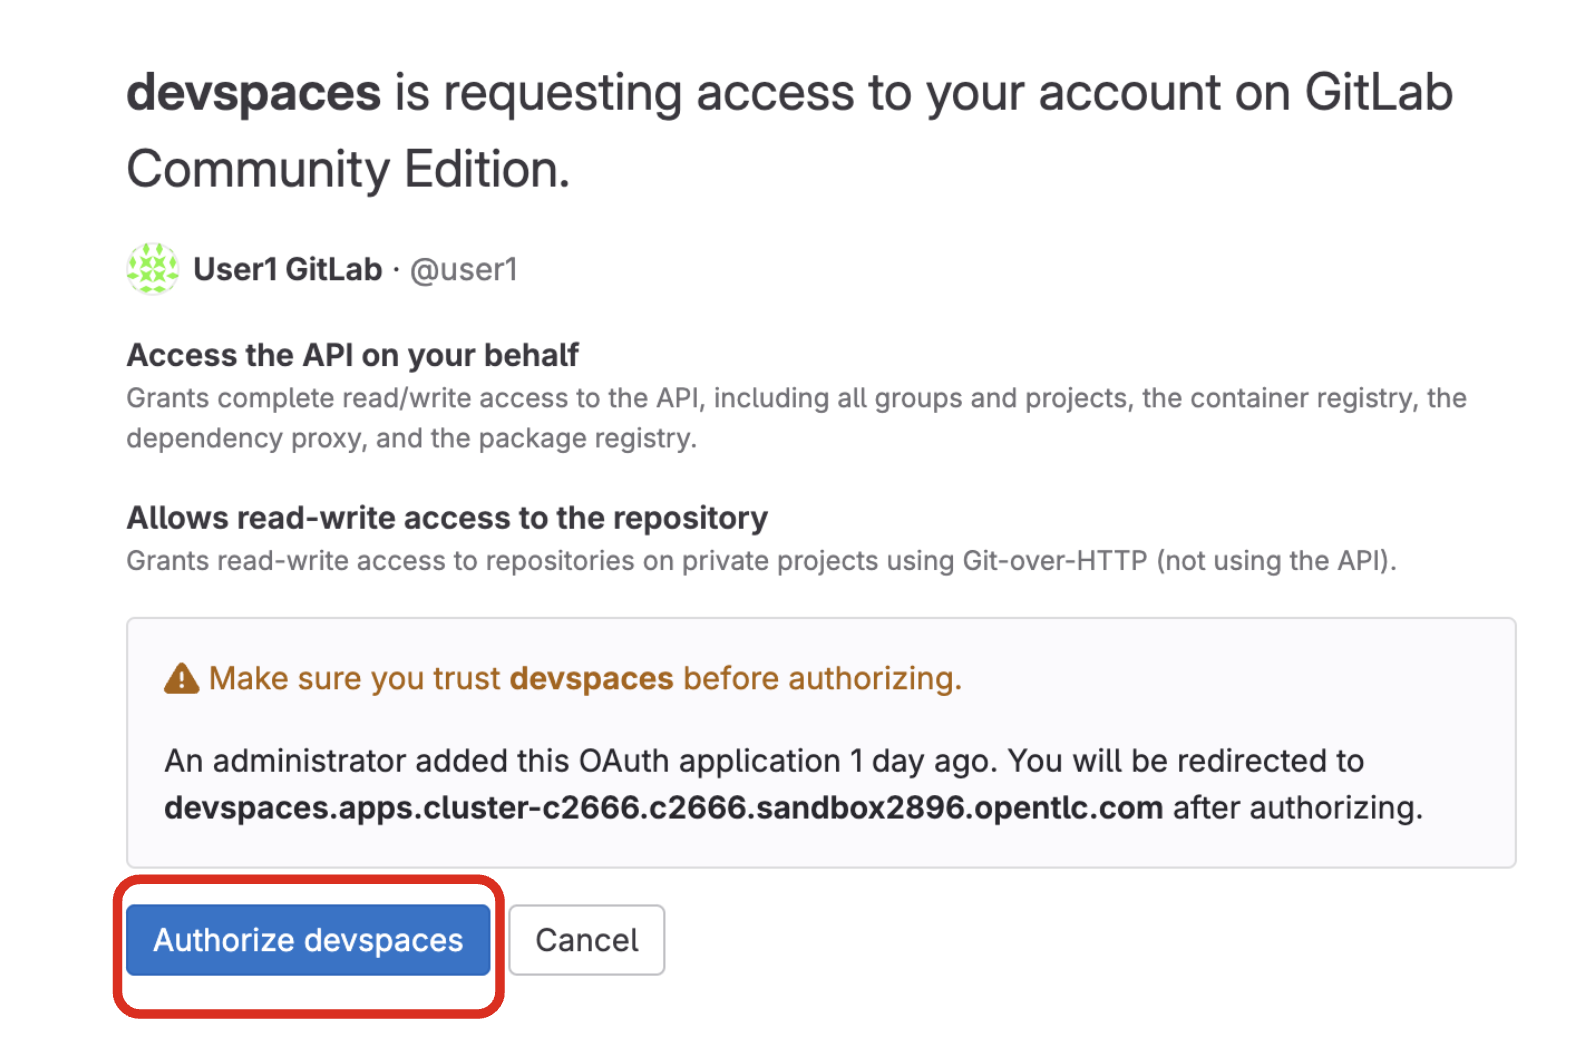
Authorize devspaces to use your account by clicking on the Authorize button.
Wait for your Red Hat OpenShift Dev Spaces workspace to be ready. This can take a few minutes.
You will see a loading screen while the workspace is being provisioned, where Dev Spaces is creating a workspace based on a devfile stored in the source code repository, which can be customized to include your tools and configuration.
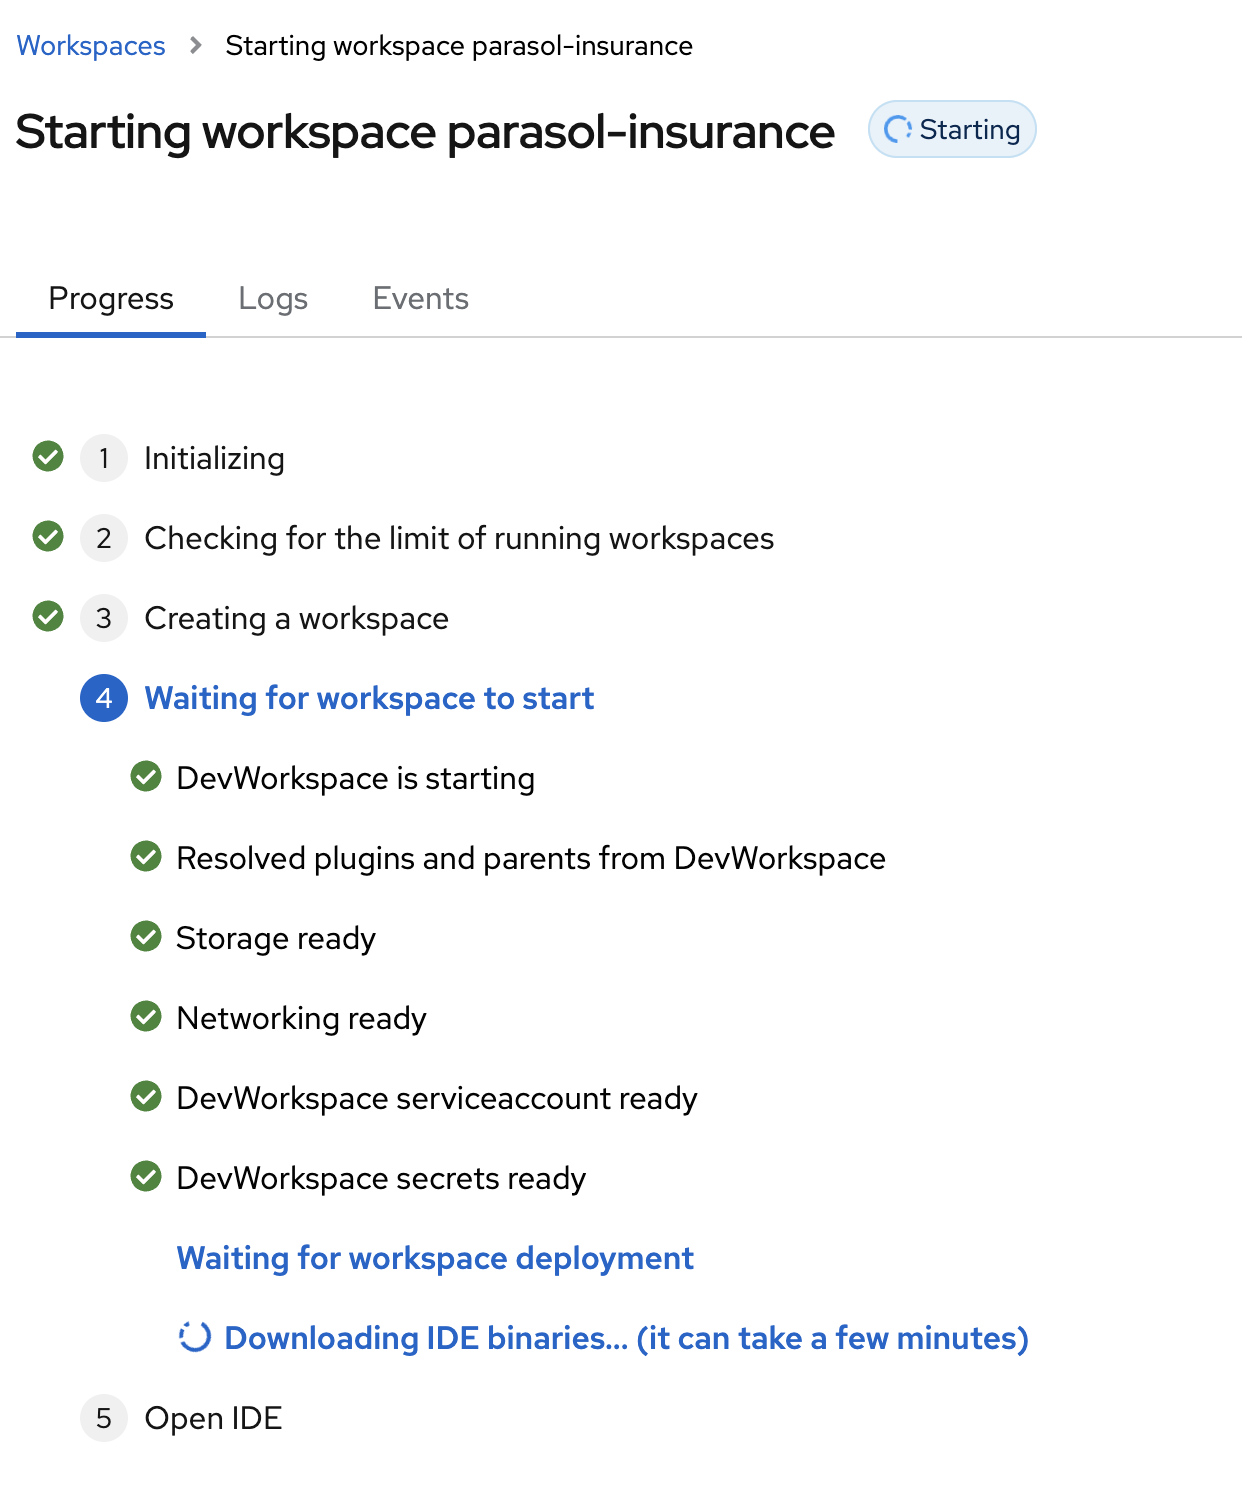
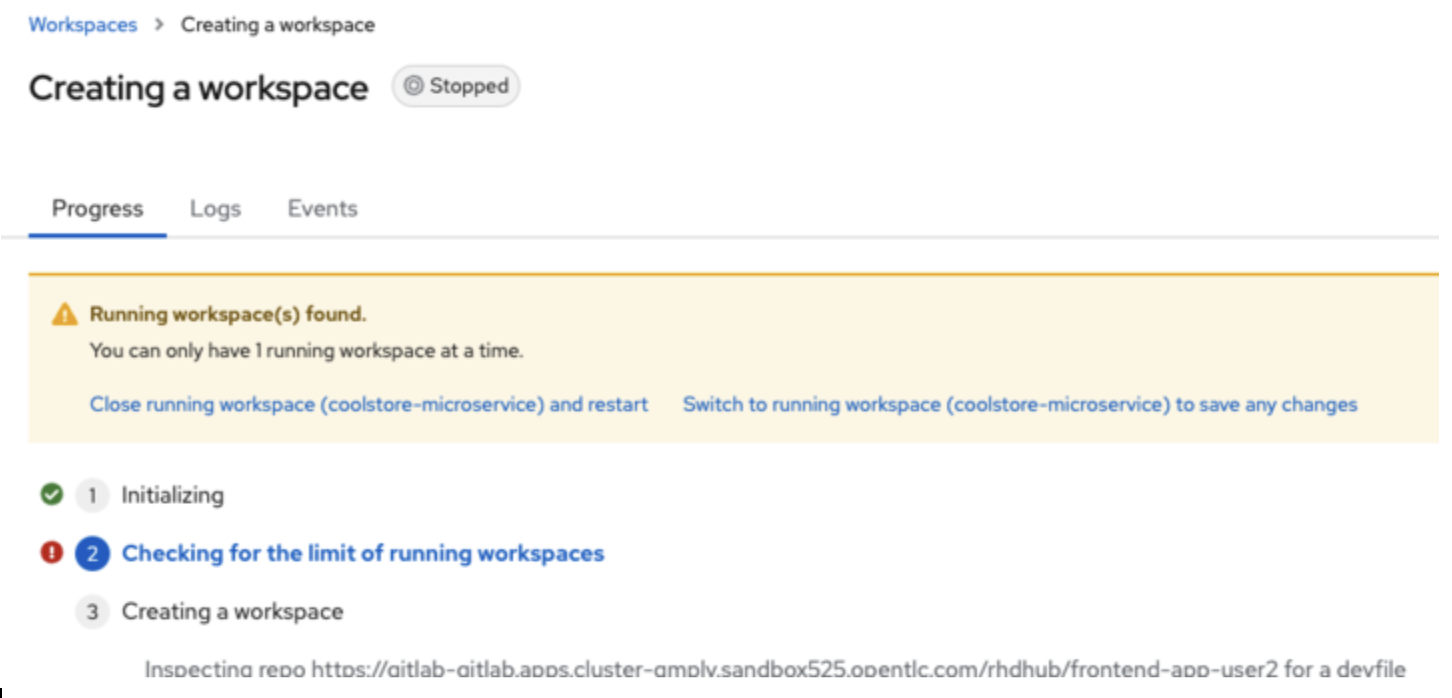
NOTE: In case your workspace fails to start, you can click on close running workspace and restart to try again.
Confirm the access by clicking "Yes, I trust the authors".
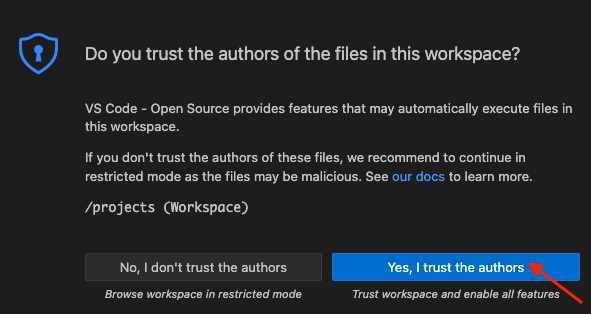
Then you should see:
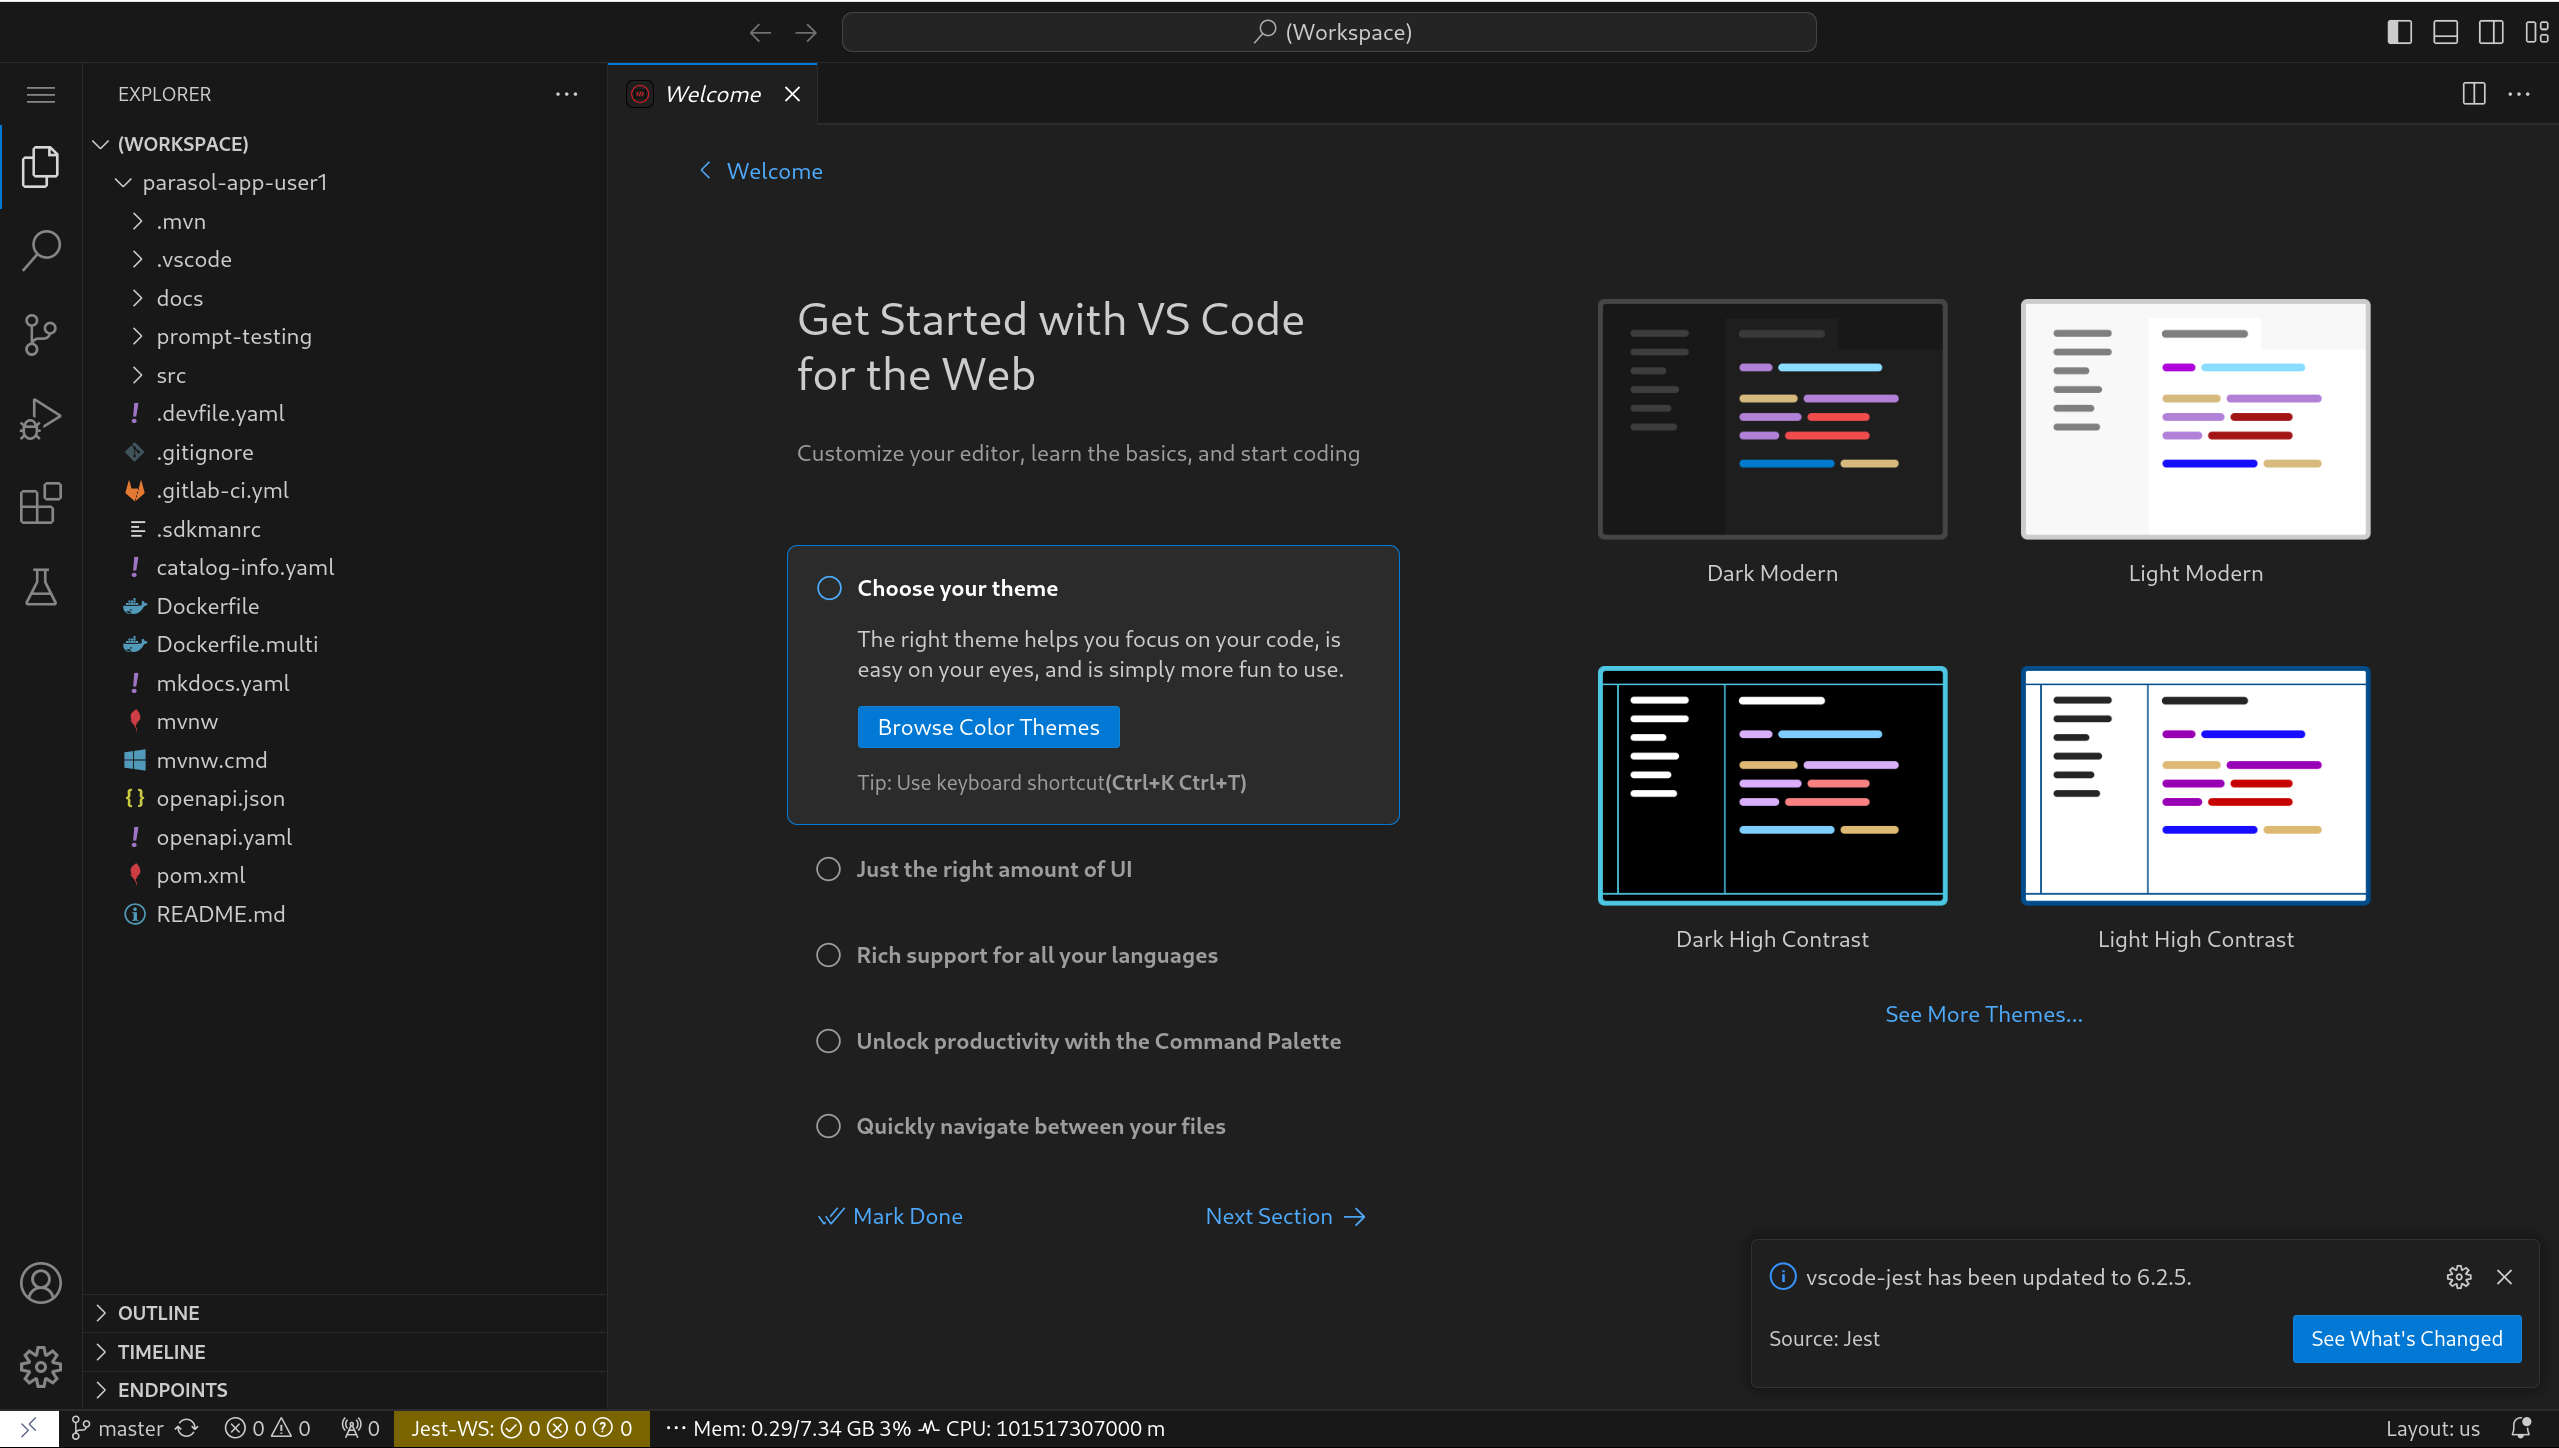
5. Working in your Cloud-based Development Environment
Red Hat OpenShift Dev Spaces is a cloud-based development environment built on top of Kubernetes and containers. It offers a streamlined and secure way for developers to code, build, and test applications directly within the OpenShift ecosystem. You’ll use the Dev Spaces environment in this module to enhance the current functionality of the Parasol Insurance application.
5.1. Using LangChain4j with Quarkus
You’ll be building new features in this application, based on Quarkus and the LangChain4j library. The Quarkus LangChain4j extensions bridge the gap between your Quarkus application and LangChain4j, a library that allows interaction with various LLMs like OpenAI, Hugging Face, or Ollama. It has the following key features and benefits:
-
Simplified LLM Integration: The extension streamlines the process of incorporating LLMs into your application, saving development time and effort.
-
Declarative AI Services: Defines how you want to interact with the LLM using annotations or configuration files.
-
Embedding Support: Integrates with document embedding stores like Redis, Chroma, or Infinispan to store and retrieve document context for the LLM.
-
Observability Integration: Allows monitoring and logging of LLM interactions within your Quarkus application.
5.2. Reset your workspaace
Before examining the application’s code we need to first ensure you are starting from a clean state. Whether this is the first module you are completing or not, this module assumes starting from scratch.
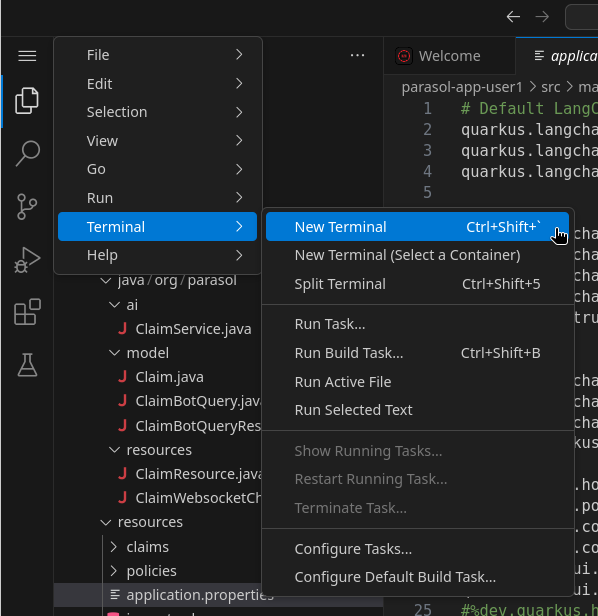
Open a terminal window within Dev Spaces by clicking on the hamburger menu button in the top left, then click on Terminal and finally on New Terminal as seen below:
In the terminal window that has appeared at the bottom of the editor, run the following command:
sh ${PROJECT_SOURCE}/scripts/clean-up.sh5.3. Understanding the application’s codebase
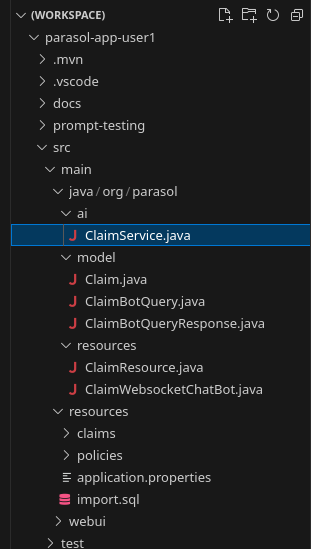
This Quarkus application is a customer service processing tool that handles customer claim emails for Parasol insurance. The team has recently improved the application with a chatbot to interact with the agent and to generate responses based on the email content. In the VS Code environment, navigate to the src/main/java/org/parasol directory, which contains the main source code of the application.
In the src/main/java/org/parasol/ai/ClaimService.java file, you’ll find the main AI chatbot class that processes the customer claim emails with a @SystemMessage and @UserMessage annotation, and a chat method. The chat method processes the claim details and question, then generates a response based on the claim and references provided.
| If you’re unfamiliar with what a system or user message is, you might want to read through the Prompting Basics module first. |
package org.parasol.ai;

import jakarta.enterprise.context.SessionScoped;

import org.parasol.model.ClaimBotQuery;

import dev.langchain4j.service.SystemMessage;
import dev.langchain4j.service.UserMessage;
import io.quarkiverse.langchain4j.RegisterAiService;
import io.smallrye.mutiny.Multi;

@RegisterAiService(modelName = "parasol-chat")
@SessionScoped
public interface ClaimService {
    @SystemMessage("""
        You are a helpful, respectful and honest assistant named "Parasol Assistant".
        You will be given a claim summary, references to provide you with information, and a question. You must answer the question based as much as possible on this claim with the help of the references.
        Always answer as helpfully as possible, while being safe. Your answers should not include any harmful, unethical, racist, sexist, toxic, dangerous, or illegal content. Please ensure that your responses are socially unbiased and positive in nature.

        If a question does not make any sense, or is not factually coherent, explain why instead of answering something not correct. If you don't know the answer to a question, please don't share false information.

        You must answer in 4 sentences or less.

        Don't make up policy term limits by yourself.
        """
    )
    @UserMessage("""
        Claim ID: {{query.claimId}}

        Policy Inception Date: {{query.inceptionDate}}

        Claim Summary:
        {{query.claim}}

        Question: {{query.query}}
    """)
    Multi<String> chat(ClaimBotQuery query);
}
You can also explore the src/main/resources/application.properties file to review the application configuration, including the Quarkus configuration and the LangChain4j extension settings.
# Default LangChain4J configuration
quarkus.langchain4j.parasol-chat.chat-model.provider=openai
quarkus.langchain4j.log-requests=true
quarkus.langchain4j.log-responses=true
quarkus.langchain4j.parasol-chat.chat-model.stop=DONE,done,stop,STOP

# OpenAI
quarkus.langchain4j.openai.parasol-chat.chat-model.temperature=0.3
quarkus.langchain4j.openai.parasol-chat.timeout=600s
quarkus.langchain4j.openai.parasol-chat.chat-model.model-name=parasol-chat
quarkus.langchain4j.openai.parasol-chat.base-url=http://parasol-chat-predictor.aiworkshop.svc.cluster.local:8080/v1
# quarkus.tls.trust-all=true

# Ollama
quarkus.langchain4j.ollama.parasol-chat.timeout=600s
quarkus.langchain4j.ollama.parasol-chat.chat-model.model-id=llama3.2
quarkus.langchain4j.ollama.parasol-chat.chat-model.temperature=0.3
%ollama.quarkus.langchain4j.parasol-chat.chat-model.provider=ollama

# Jlama
# Uncomment to use the un-quantized model
# NOTE: This doesn't work on MacOS nor on GitHub action CI (due to the size of the model)
#quarkus.langchain4j.jlama.parasol-chat.chat-model.model-name=rh-rad-ai-roadshow/parasol-trained-chat
# Use the quantized model by default
quarkus.langchain4j.jlama.parasol-chat.chat-model.model-name=mariofusco/parasol-trained-chat-JQ4
quarkus.langchain4j.jlama.parasol-chat.chat-model.temperature=0.3
%jlama.quarkus.langchain4j.parasol-chat.chat-model.provider=jlama

# Http
quarkus.http.host=0.0.0.0
quarkus.http.port=${{values.port}}
quarkus.http.cors=true
quarkus.http.cors.origins=*
quarkus.dev-ui.cors.enabled=false
quarkus.dev-ui.hosts=${{values.owner}}-parasol-insurance-quarkus-devui${{values.cluster}}

# Hibernate
quarkus.hibernate-orm.physical-naming-strategy=org.hibernate.boot.model.naming.CamelCaseToUnderscoresNamingStrategy

# Logging
%dev,test.quarkus.log.category."org.parasol".level=DEBUG
%dev,test.quarkus.log.console.level=DEBUG

# Quinoa
quarkus.quinoa.package-manager-install=true
quarkus.quinoa.package-manager-install.node-version=22.2.0
quarkus.quinoa.package-manager-install.npm-version=10.8.1
quarkus.quinoa.build-dir=dist
quarkus.quinoa.enable-spa-routing=true

# H2
%prod.quarkus.datasource.jdbc.url=jdbc:h2:mem:claims;DB_CLOSE_DELAY=-1
%prod.quarkus.datasource.username=sa
%prod.quarkus.datasource.password=sa
%prod.quarkus.hibernate-orm.sql-load-script=import.sql
%prod.quarkus.hibernate-orm.database.generation=drop-and-create

# Websockets
quarkus.websockets-next.server.auto-ping-interval=1m

# OpenTelemetry & Tracing
quarkus.otel.enabled=true
quarkus.datasource.jdbc.telemetry=${quarkus.otel.enabled}
quarkus.otel.exporter.otlp.traces.endpoint=http://otel-collector.parasol-app-${{values.owner}}-dev.svc.cluster.local:4317| The application is currently configured to be able to communicate with either an OpenAI-compliant or an Ollama-compliant endpoint. More on that later! |
6. Testing out the existing chatbot
Now that we’ve checked out the chatbot code and gotten to a clean state, let’s test it locally.
In the terminal window that you opened earlier at the bottom of the editor, run the following command:
./mvnw clean quarkus:dev -Dquarkus.otel.enabled=true -Dquarkus.otel.exporter.otlp.traces.endpoint=http://jaeger.parasol-app-user1-dev.svc.cluster.local:4317This will download some dependencies and start the application in Quarkus Dev Mode.
| You may get asked to contribute anonymous build time data. It’s up to you what to answer, but we recommend answering yes so the Quarkus developers can have valuable performance insights to improve Quarkus even further. |
After a minute or 2, depending on network speeds, your application will be up and running:
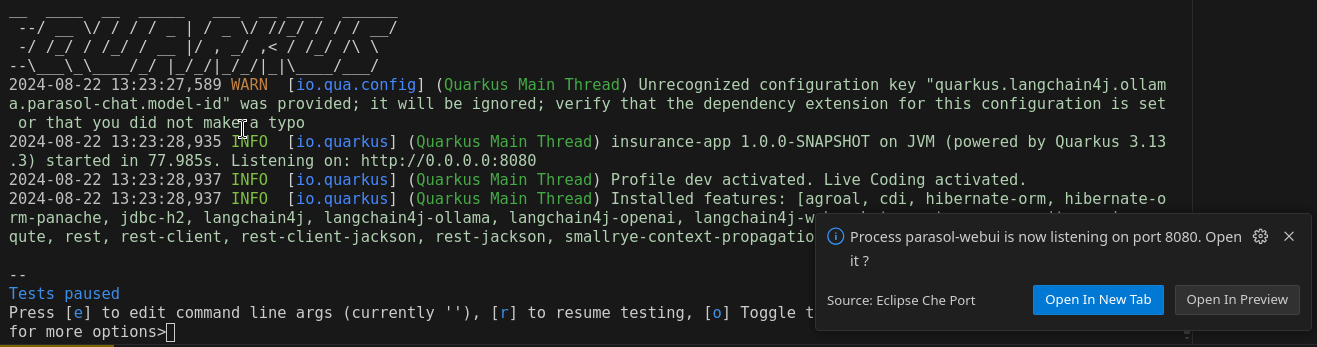
Go ahead and click the Open In New Tab button that shows up in the bottom right
|
If you are prompted about allowing VSCode to open an external website, click Open. 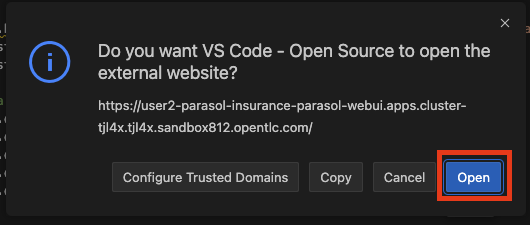
|
You should now see the Parasol UI in the new tab.
6.1. Click on the first claim with number CLM195501 to open the claim
Then on the chat icon in the bottom right corner to open the chat interface.
6.2. In the chat interface, try asking the following questions about a specific claim
What is the status of this claim?When was the incident reported?What is the claimed amount?What is the inception date of the policy?You should notice that the chatbot can answer these questions based on the claim context we provided. Now, let’s ask a more complex question that requires knowledge of Parasol’s policies:
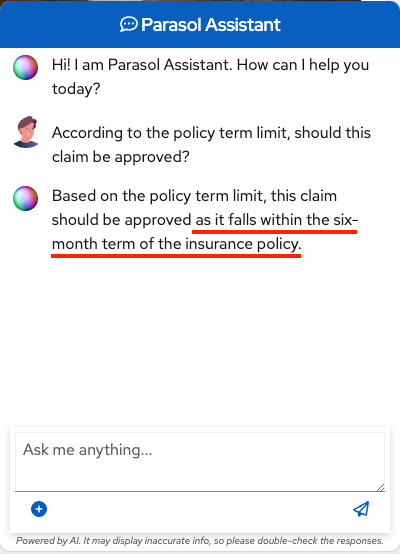
6.3. Ask the chatbot: "According to the policy term limit, should this claim be approved?"
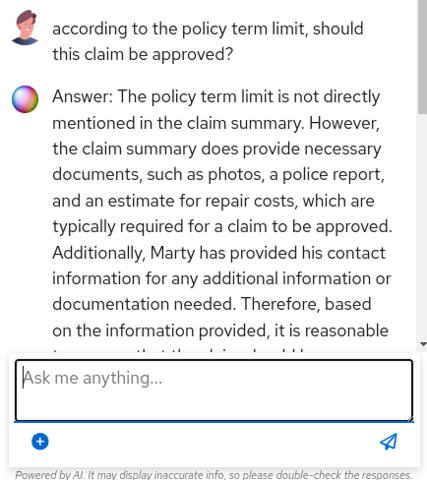
The answer you will get back might be different from the one in the screenshot above, but you’ll likely observe that the chatbot struggles with this question, as it doesn’t have access to Parasol’s specific policies, in particular the 6 month policy term limit. It might even respond with an incorrect decision, but sound very authoritative when doing so:
If only there was a way to automatically retrieve this information and provide it to the chatbot so that answers were more accurate!
7. Embedding Documents with RAG
Retrieval-Augmented Generation (RAG) is a technique that enhances language models by providing them with relevant information retrieved from a knowledge base. This is particularly useful when dealing with domain-specific knowledge or private data.
7.1. When to use RAG vs fine-tuning
Use Retrieval-Augmented Generation (RAG) when you need to access a dynamic knowledge base in real-time, especially for tasks that involve varied or constantly updating information. RAG is ideal if you require scalability, need to handle out-of-domain queries, or want to deploy quickly without the resource demands of fine-tuning - which often requires specialized knowledge of working with AI models, something application developers often don’t possess.
On the other hand, choose fine-tuning when your task is specialized and you need precise control over the model’s behavior. Fine-tuning is better suited for homogeneous data, offline or low-latency applications, and situations where security or compliance requires all data to be embedded within the model. It’s also preferable when you have a well-defined use case with specific task requirements.
| See the AI Model Fine-Tuning module for more information on fine-tuning models. |
7.2. Add Parasol-specific policies to the LLM’s knowledge base with RAG
While we could use a vector database to store vectorized data to use with RAG, we can also simply specify a directory where text-based files are stored. We can then parse this data, retrieve similar data, vectorize it, and pass it along to our LLM calls. This process is made very easy with the aptly named "Easy RAG" extension in Quarkus.
Return to Dev Spaces and open a new terminal window as you did before (click on the hamburger menu button in the top left, then click on Terminal and finally on New Terminal), or click the + button on the top-right of your current terminal.
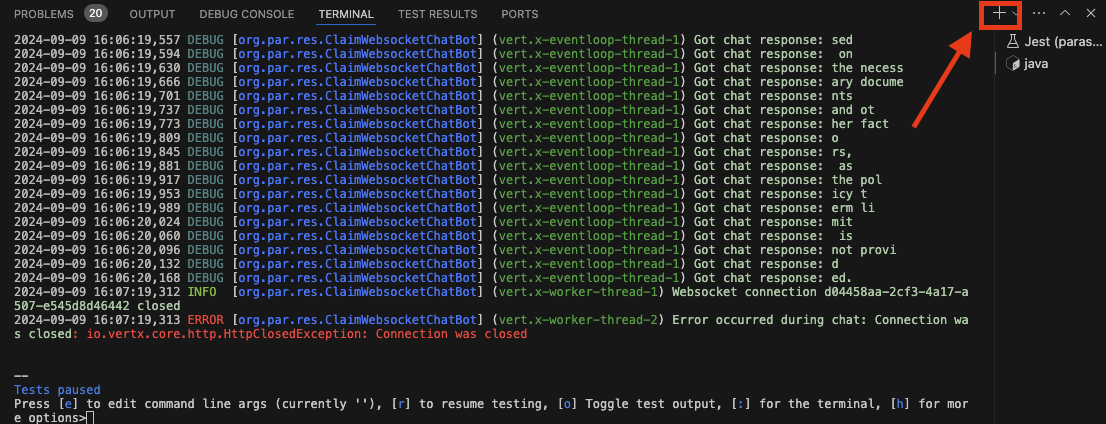
In the new terminal, add this extension by running the following command:
./mvnw quarkus:add-extension -Dextension="io.quarkiverse.langchain4j:quarkus-langchain4j-easy-rag:\${quarkus.langchain4j.version}"You will see that a new extension was added to your application:
[INFO] Looking for the newly published extensions in registry.quarkus.io
[INFO] [SUCCESS] ✅ Extension io.quarkiverse.langchain4j:quarkus-langchain4j-easy-rag:xx.xx.xx has been installed|
Dev Spaces may also ask if you would like to open the application again. This is because the Quarkus dev mode in your other terminal has restarted due to adding a new extension. Don’t open the application again yet, we first need to add some configuration for the new extension. |
|
You will most likely see errors if you open the application again (or return to the console the application is running in) before completing the following configuration. Please continue with the following configuration before reattempting to use the application. |
We have already added a policy document (policy-info.pdf) in the src/main/resources/policies folder. Click here to view it.
We can tell the Easy Rag extension where to find it by adding the following lines in your src/main/resources/application.properties:
# RAG
quarkus.langchain4j.embedding-model.provider=openai(1)
quarkus.langchain4j.easy-rag.path=src/main/resources/policies(2)
quarkus.langchain4j.easy-rag.reuse-embeddings.enabled=true(3)
quarkus.langchain4j.openai.base-url=http://parasol-embedding-predictor.aiworkshop.svc.cluster.local:8080/v1(4)
quarkus.langchain4j.openai.embedding-model.model-name=parasol-embedding(5)| 1 | Instructs Quarkus to use an OpenAI-compliant endpoint for computing embeddings |
| 2 | Path to the folder that contains the RAG documents |
| 3 | Reuse embeddings so when we restart the application it does not need to re-vectorize the documents |
| 4 | The URL to the embedding model server being to compute and search embeddings |
| 5 | The name of the embedding model being used to compute and search embeddings |
| In production, these embeddings would most likely be pre-computed as part of an outer-loop pipeline and stored into a vector database that the application would read from. |
That’s all there is to it! When Quarkus restarts it will read the src/main/resources/policies/policy-info.pdf file and compute vectorized embeddings for all the text in the document. It will then store these embeddings into an in-memory vector store. When chatting with the chatbot the application will first query the vector store for relevant information, which it will then pass to the LLM with the user’s query.
Reload the browser window to make sure Quarkus Dev mode picks up the changes.
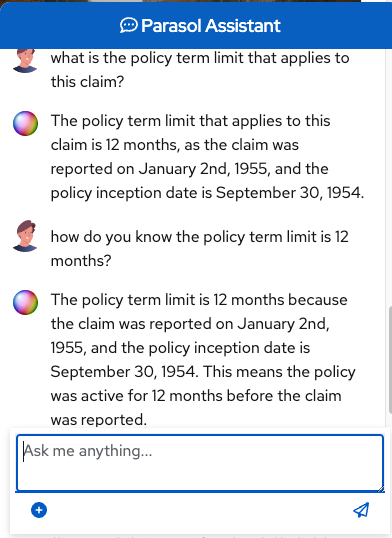
Now ask the same question in the chat window:
According to the policy term limit, should this claim be approved?This time the bot should be able to answer the questions with accurate information based on the policies document!
| The actual result you see may differ from the screenshot due to the non-deterministic nature of LLMs. |
8. Enhancing functionality with tools and agents
Until now we have had fairly straightforward interactions with the AI LLM model, in that we have asked it questions and it responded with some text and it was up to us to interpret the result.
Wouldn’t it be nice if we could instruct the model to actually call some code in our application and "do" something? That’s what the "Tool" concept is all about.
In this section we’re going to instruct the LLM to call a piece of code that will change the status of a claim and send a notification email to the claimant.
8.1. Add and configure mail extensions
In Dev Spaces, switch to the second terminal you opened previously (NOT the one currently running Quarkus dev mode).
Add the mailer and mailpit extensions to the Quarkus application by issuing the following command in this terminal.
./mvnw quarkus:add-extension -Dextensions="mailpit,mailer"Open src/main/resources/application.properties and add the mail configuration:
# Mail
%dev.quarkus.mailer.mock=false
quarkus.mailer.tls=false
quarkus.mailpit.image-name=quay.io/rhappsvcs/mailpit:latest
8.2. Create Notification tool
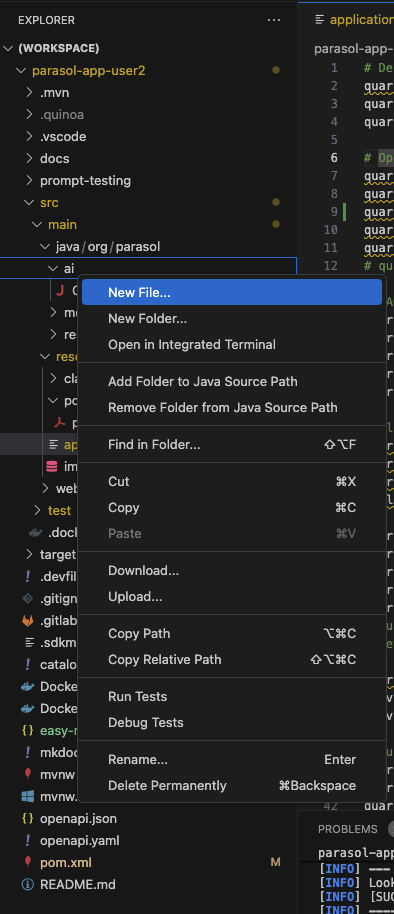
Now let’s create a new NotificationService class that will have the functionality to update claim status and send an email. Create a new file NotificationService.java in the src/main/java/org/parasol/ai folder.

Overwrite all the content in the file with the following:
package org.parasol.ai;

import java.util.Optional;

import jakarta.enterprise.context.ApplicationScoped;
import jakarta.inject.Inject;
import jakarta.transaction.Transactional;

import org.parasol.model.Claim;

import io.quarkus.mailer.Mail;
import io.quarkus.mailer.Mailer;

import dev.langchain4j.agent.tool.Tool;
import io.opentelemetry.instrumentation.annotations.SpanAttribute;
import io.opentelemetry.instrumentation.annotations.WithSpan;

@ApplicationScoped
public class NotificationService {
	// Invalid status to set
	static final String INVALID_STATUS = "Status \"%s\" is not a valid status";

	// Respond to the AI with success
	static final String NOTIFICATION_SUCCESS = "%s (claim number %s) has been notified of status update \"%s\"";

	// Respond to the AI with the fact that we couldn't find a claim record for some reason (shouldn't ever happen, but who knows...)
	static final String NOTIFICATION_NO_CLAIMANT_FOUND = "No claim record found in the database for the given claim";

	// Who the email is from
	static final String MESSAGE_FROM = "noreply@parasol.com";

	// Email subject
	static final String MESSAGE_SUBJECT = "Update to your claim";

	// Email body
	static final String MESSAGE_BODY = """
		Dear %s,

		This is an official communication from the Parasol Insurance Claims Department. We wanted to let you know that your claim (claim # %s) has changed status to "%s".

		Sincerely,
		Parasoft Insurance Claims Department

		--------------------------------------------
		Please note this is an unmonitored email box.
		Should you choose to reply, nobody (not even an AI bot) will see your message.
		Call a real human should you have any questions. 1-800-CAR-SAFE.
		""";

	@Inject
	Mailer mailer;

	@Tool("update claim status")
	@Transactional
	@WithSpan("NotificationService.updateClaimStatus")
	public String updateClaimStatus(@SpanAttribute("arg.claimId") long claimId, @SpanAttribute("arg.status") String status) {
		// Only want to actually do anything if the passed in status has at lease 3 characters
		return Optional.ofNullable(status)
			.filter(s -> s.trim().length() > 2)
			.map(s -> updateStatus(claimId, s))
			.orElse(INVALID_STATUS.formatted(status));
	}

	private String updateStatus(long claimId, String status) {
		// Only want to actually do anything if there is a corresponding claim in the database for the given claimId
		return Claim.<Claim>findByIdOptional(claimId)
			.map(claim -> updateStatus(claim, status))
			.orElse(NOTIFICATION_NO_CLAIMANT_FOUND);
	}

	private String updateStatus(Claim claim, String status) {
		// Capitalize the first letter
		claim.status = status.trim().substring(0, 1).toUpperCase() + status.trim().substring(1);

		// Save the claim with updated status
		Claim.persist(claim);

		// Send the email
		sendEmail(claim);

		// Return a note to the AI
		return NOTIFICATION_SUCCESS.formatted(claim.emailAddress, claim.claimNumber, claim.status);
	}

	private void sendEmail(Claim claim) {
		// Create the email
		var email = Mail.withText(
			claim.emailAddress,
				MESSAGE_SUBJECT,
				MESSAGE_BODY.formatted(claim.clientName, claim.claimNumber, claim.status)
			)
			.setFrom(MESSAGE_FROM);

		// Send the email to the user
		this.mailer.send(email);
	}
}
There is a fair bit of code in this file, but the main thing you should pay attention to is the @Tool annotation with the instruction "update claim status". This piece of natural language text you add to the annotation is interpreted by the LLM, which will now know that if you tell it to "update the claim status of my case", it should call the updateClaimStatus method with given parameters.
8.3. Wire tool to the chat service
To wire everything up, we will need to tell the AI Service about this tool. In the src/main/java/org/parasol/ai folder, open the ClaimService.java class again.
We need to register the NotificationService class as a tool. Find the chat method and add the following annotation to it:
@ToolBox(NotificationService.class)|
You may need to add the following import to the |
By doing this we have now registered the NotificationService file as a class that contains one or more @Tool annotated methods. These methods become available to the LLM to be called.
8.4. Convert chat from streaming to synchronous
We now need to make a few more changes. Currently when we chat with the assistant the responses stream back to us one word at a time. Unfortunately when using tools you can’t use this feature. Instead, we need to make a request and wait for the entire response from the LLM.
Still in src/main/java/org/parasol/ai/ClaimService.java, replace the line
Multi<String> chat(ClaimBotQuery query);with
String chat(ClaimBotQuery query);Then open src/main/java/org/parasol/resources/ClaimWebsocketChatBot.java and replace
@OnTextMessage
@WithSpan("ChatMessage")
public Multi<ClaimBotQueryResponse> onMessage(ClaimBotQuery query) {
    Log.infof("Got chat query: %s", query);

    return bot.chat(query)
      .invoke(response -> Log.debugf("Got chat response: %s", response))
      .map(resp -> new ClaimBotQueryResponse("token", resp, ""));
}
with
@OnTextMessage
@WithSpan("ChatMessage")
public ClaimBotQueryResponse onMessage(ClaimBotQuery query) {
    Log.infof("Got chat query: %s", query);
    var response = new ClaimBotQueryResponse("token", this.bot.chat(query), "");
    Log.debugf("Got chat response: %s", response);

    return response;
}
When the application restarts you may see compilation errors in the console. This is because we updated the ClaimWebsocketChatBot class but did not update the corresponding tests. That is ok. The application will continue to function properly.
|
8.5. Configure new LLM with tool support
The last thing we need to do is to switch to a different LLM for our chat bot because the parasol-chat model does not currently support tools integration.
Open src/main/resources/application.properties and overwrite these lines:
quarkus.langchain4j.openai.parasol-chat.chat-model.model-name=parasol-chat
quarkus.langchain4j.openai.parasol-chat.base-url=http://parasol-chat-predictor.aiworkshop.svc.cluster.local:8080/v1
with:
quarkus.langchain4j.openai.parasol-chat.chat-model.model-name=llama3.1
quarkus.langchain4j.openai.parasol-chat.base-url=http://parasol-tools.aiworkshop.svc.cluster.local/v1
Let’s try it out! Go back to the browser and refresh the claim page for claim 195501 (Marty McFly).
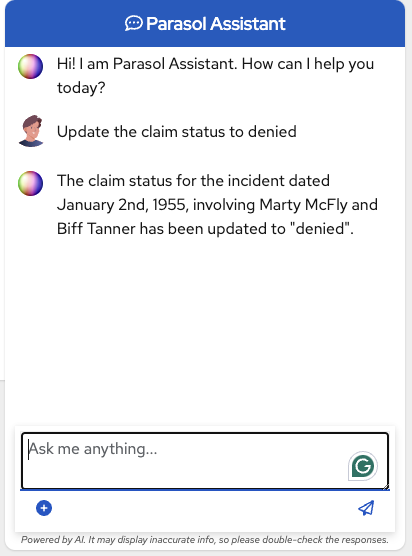
Open the chat interface again and this time tell the chat assistant:
Update the claim status to deniedAfter a few moments (it could take up to a minute or so) you should see that the chatbot answers, telling you that it updated the status and sent an email to the customer.
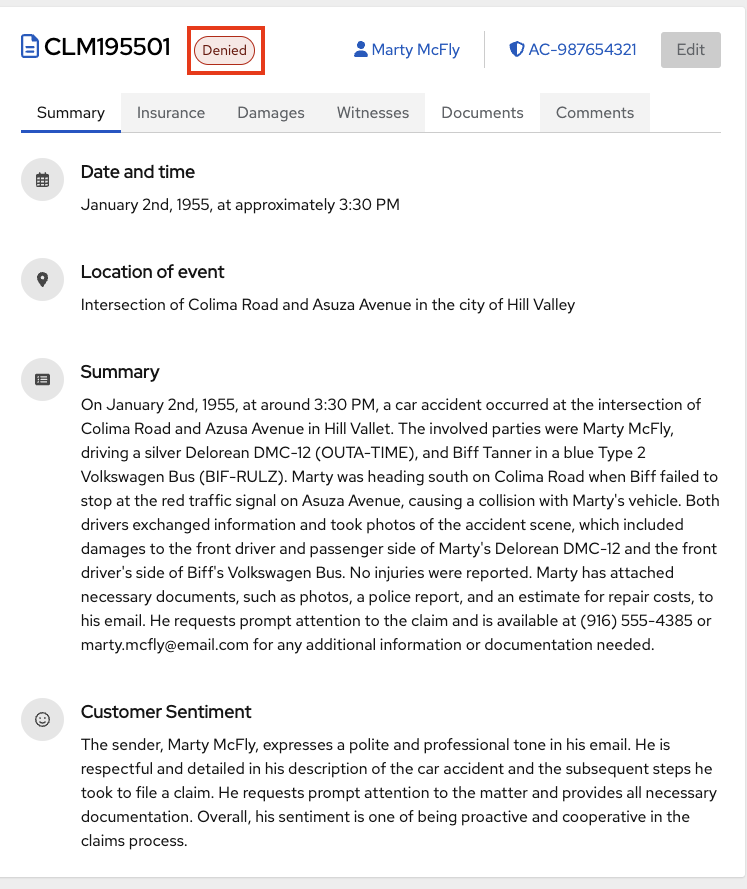
If you refresh the chat page you should also see that the claim’s status has now been changed to denied:
Since we’re running this exercise in Quarkus Dev Mode, we can actually test if the email functionality actually works, thanks to the MailPit extension which provides a Quarkus Dev Service with a mock email server.
Go to the Quarkus Dev UI by opening the Endpoints view within Dev Spaces and finding quarkus-devui, then click the Open in a new tab button.
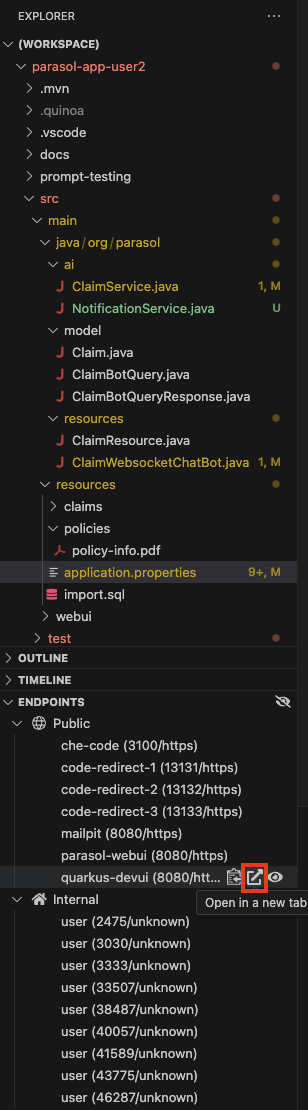
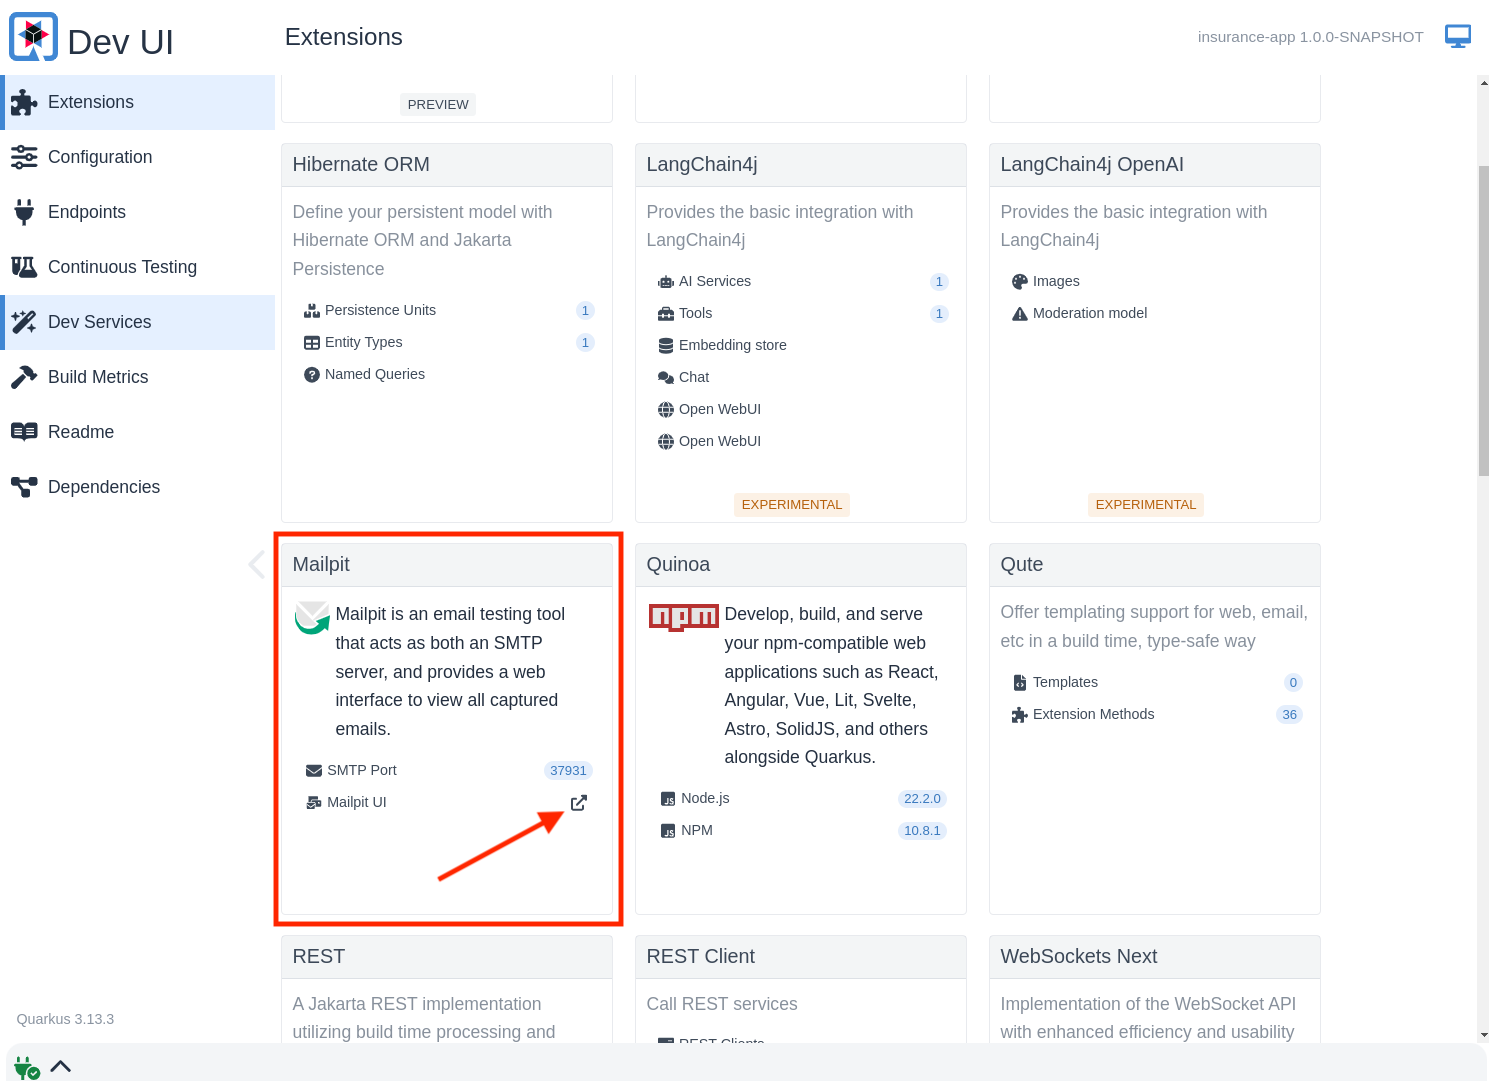
Find the "Mailpit" section and click on the link next to "Mailpit UI" and you will see a new email that was sent thanks to our newly added functionality!
| The mailpit section might not be exactly in the same location as in the screenshot above. |

Click on the email to open it
You can now verify that the user received the email!
9. Observability of AI-infused applications
9.1. What is OpenTelemetry?
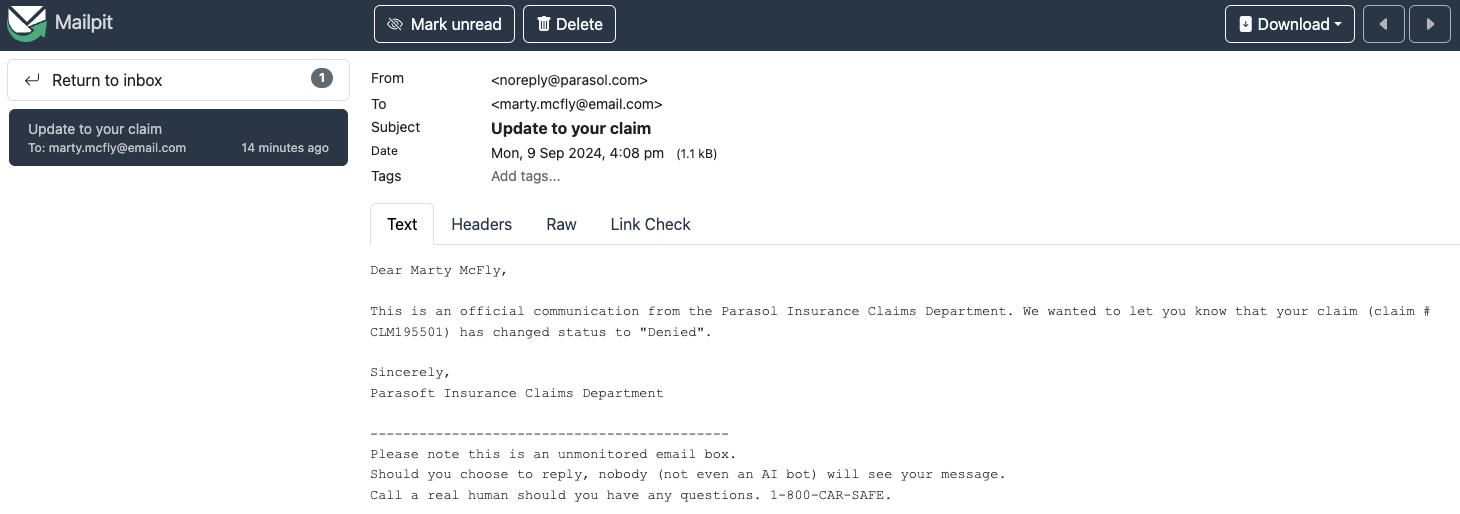
OpenTelemetry is a collection of tools, APIs, and SDKs. Use it to instrument, generate, collect, and export telemetry data (metrics, logs, and traces) to help you analyze your software’s performance and behavior.
OpenTelemetry was created by merging the popular OpenTracing and OpenCensus projects. It is a standard that integrates with many open source and commercial products written in many programming languages. Implementations of OpenTelemetry are in varying stages of maturity.
At its core, OpenTelemetry contains the Collector, a vendor-agnostic way to receive, process, and export telemetry data.
9.2. Integrating OpenTelemetry into our application
Integrating OpenTelemetry is easy! In fact, simply adding the quarkus-opentelemetry extension to an application will automatically configure many other extensions to use it!
You might not have realized that everything you’ve done in this module thus far has been recorded and stored in a local OpenTelemetry Collector instance and can be observed in a local Jaeger instance, an open source distributed tracing platform.
Observability is automatically built into AI services created via @RegisterAiService. The traces follow through any tool invocations, and even down to the database queries used during the workflow.
Let’s take a look!
9.3. Looking at our traces
-
Click here to open the Jaeger UI.
-
This Jaeger instance is specific to your instance of the application and does not contain any data from any other users in the workshop.
-
-
Once in the Jaeger UI, expand the Service dropdown and choose the insurance-app service.
-
This narrows the scope of observed traces just to our application
-
-
Expand the Operation dropdown and choose the ChatMessage operation.
-
This narrows the scope of observed traces just to the chat interactions with our chat bot.
-
Feel free to explore other traces afterwards!
-
-
Click the Find Traces button.
You should see something resembling the following:

| Your screenshot may look different than what is shown above. You may have more or less traces. |
Click on the top trace in the list to see a detailed view of that trace:
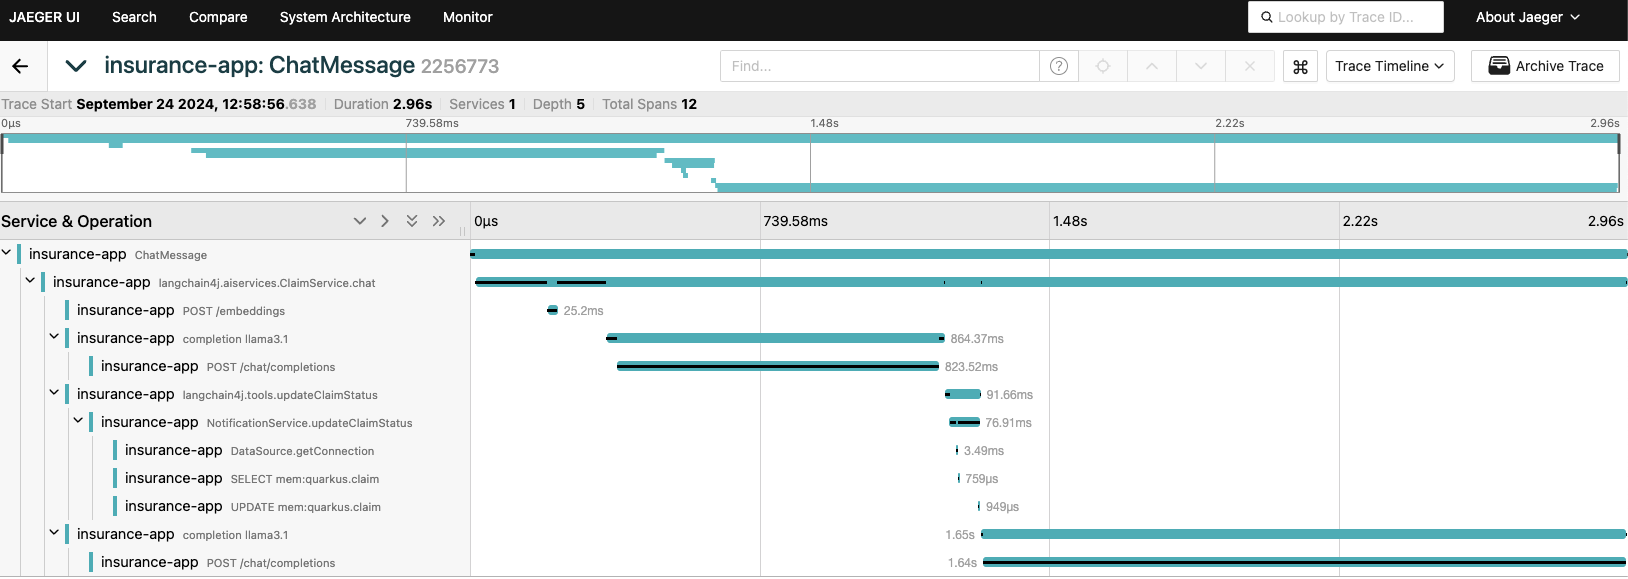
A trace consists of a series of spans. Each span is a time interval representing a unit of work. Spans often have parent/child relationships and form a hierarchy. Spans can also indicate the parallelization of work running concurrently. Each span also indicates its duration, so you can see exactly how much time each unit of work takes.
In our case there isn’t any parallelization, since all the units of work execute sequentially. You can start to drill-down through the units of work to see what actually happened when you told the chat bot to update the claim’s status to denied:
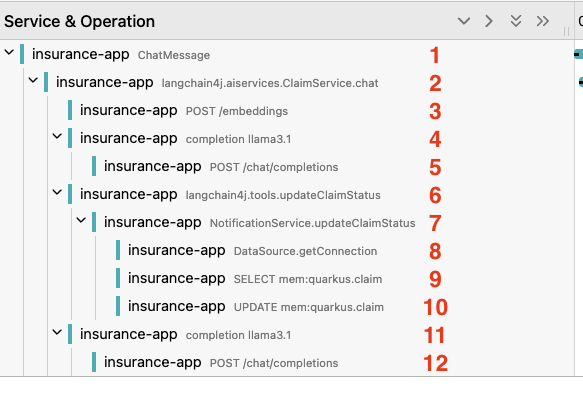
-
The entrypoint to the chat interface (
org.parasol.resources.ClaimWebsocketChatBotclass,onMessagemethod). -
Entrypoint into the
ClaimServiceAI service’schatmethod. -
REST HTTP call to the embedding model to retrieve appropriate embeddings based on the chat query.
-
Call to the
llama3.1model. -
REST HTTP call to the model server.
-
Callback from the model to invoke the
updateClaimStatustool. -
Call into our
NotificationService.updateClaimStatusmethod. -
Get a connection to the database.
-
Select the
Claimrecord from the database to update. -
Update the
Claimrecord from the database and set the claim’s status to denied. -
Send the result of the tool invocation back to the
llama3.1model. -
REST HTTP call to the model server including the result from the tool invocation.
You can click on any span to show more contextual information about the span:
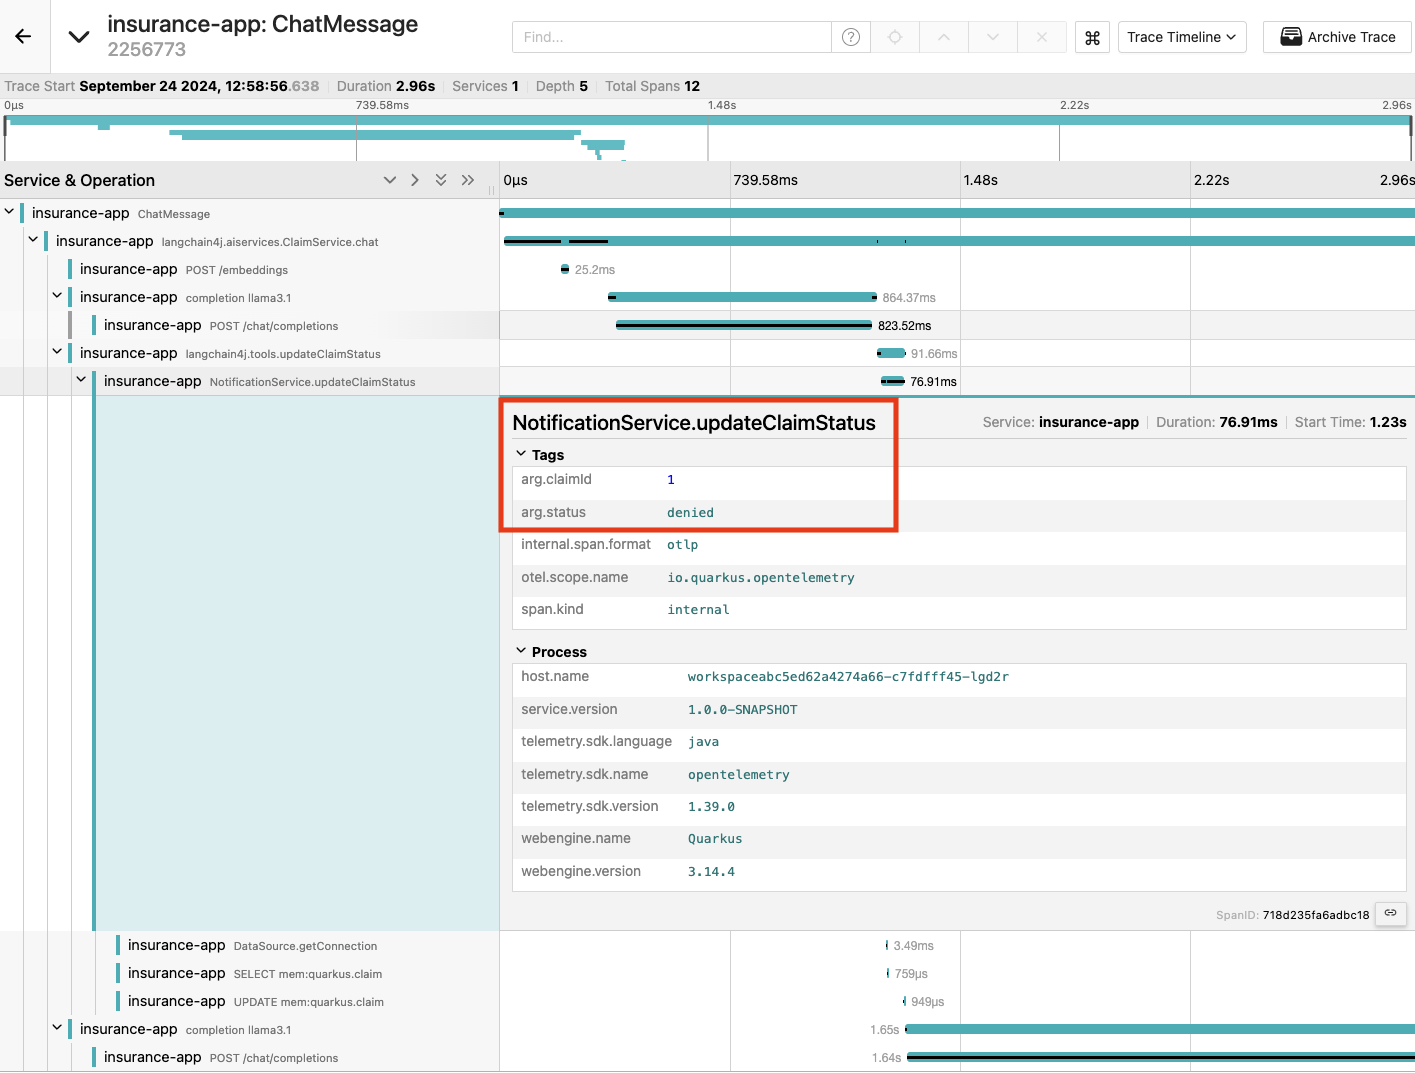
As you can see in the above screenshot, the arguments to the NotificationService.updateClaimStatus are shown so we know that the claim with claimId=1 had it’s status updated to denied.
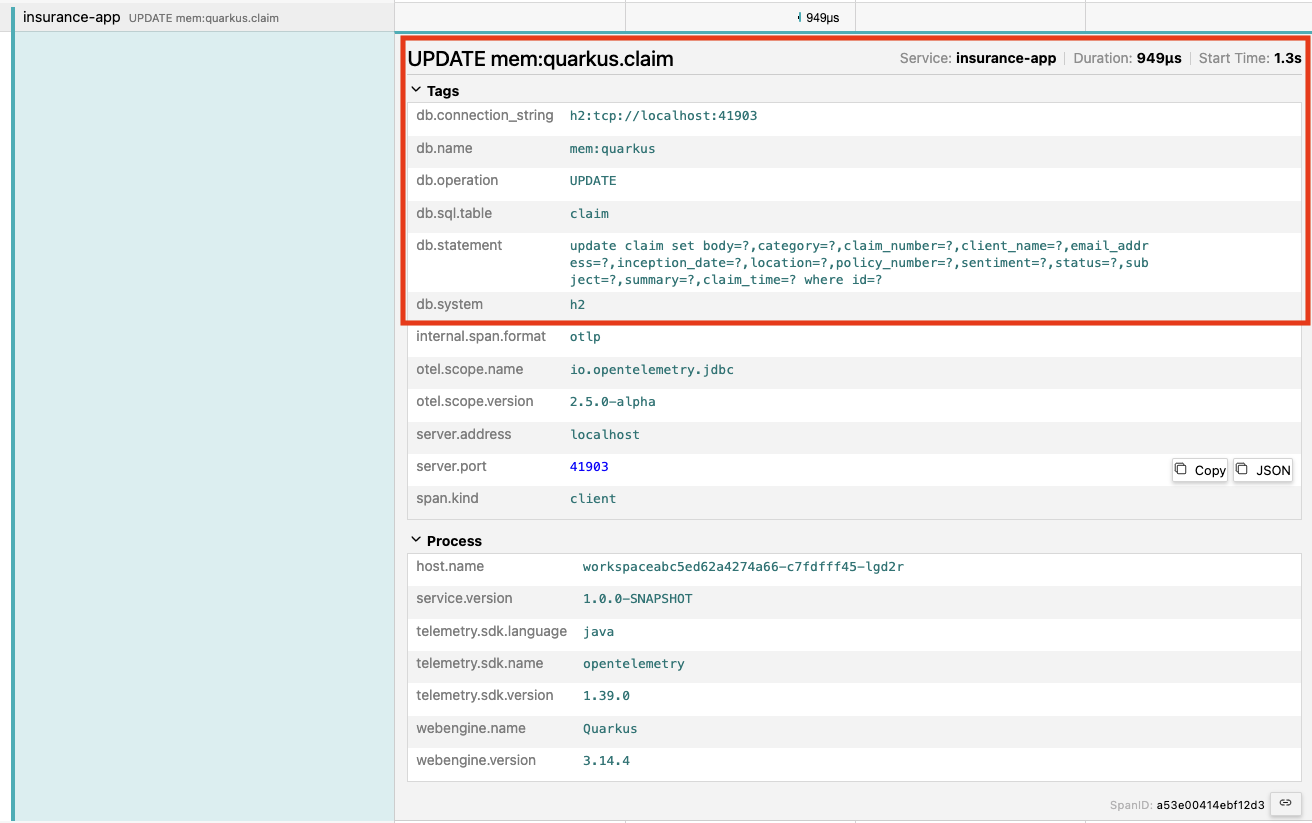
For spans that encompass database interactions you can also see relevant information:
For interactions with the AI model you can also see information related to the model, such as what model was requested, how many tokens were in the prompt, what the temperature was, as well as what the URL to the model was:
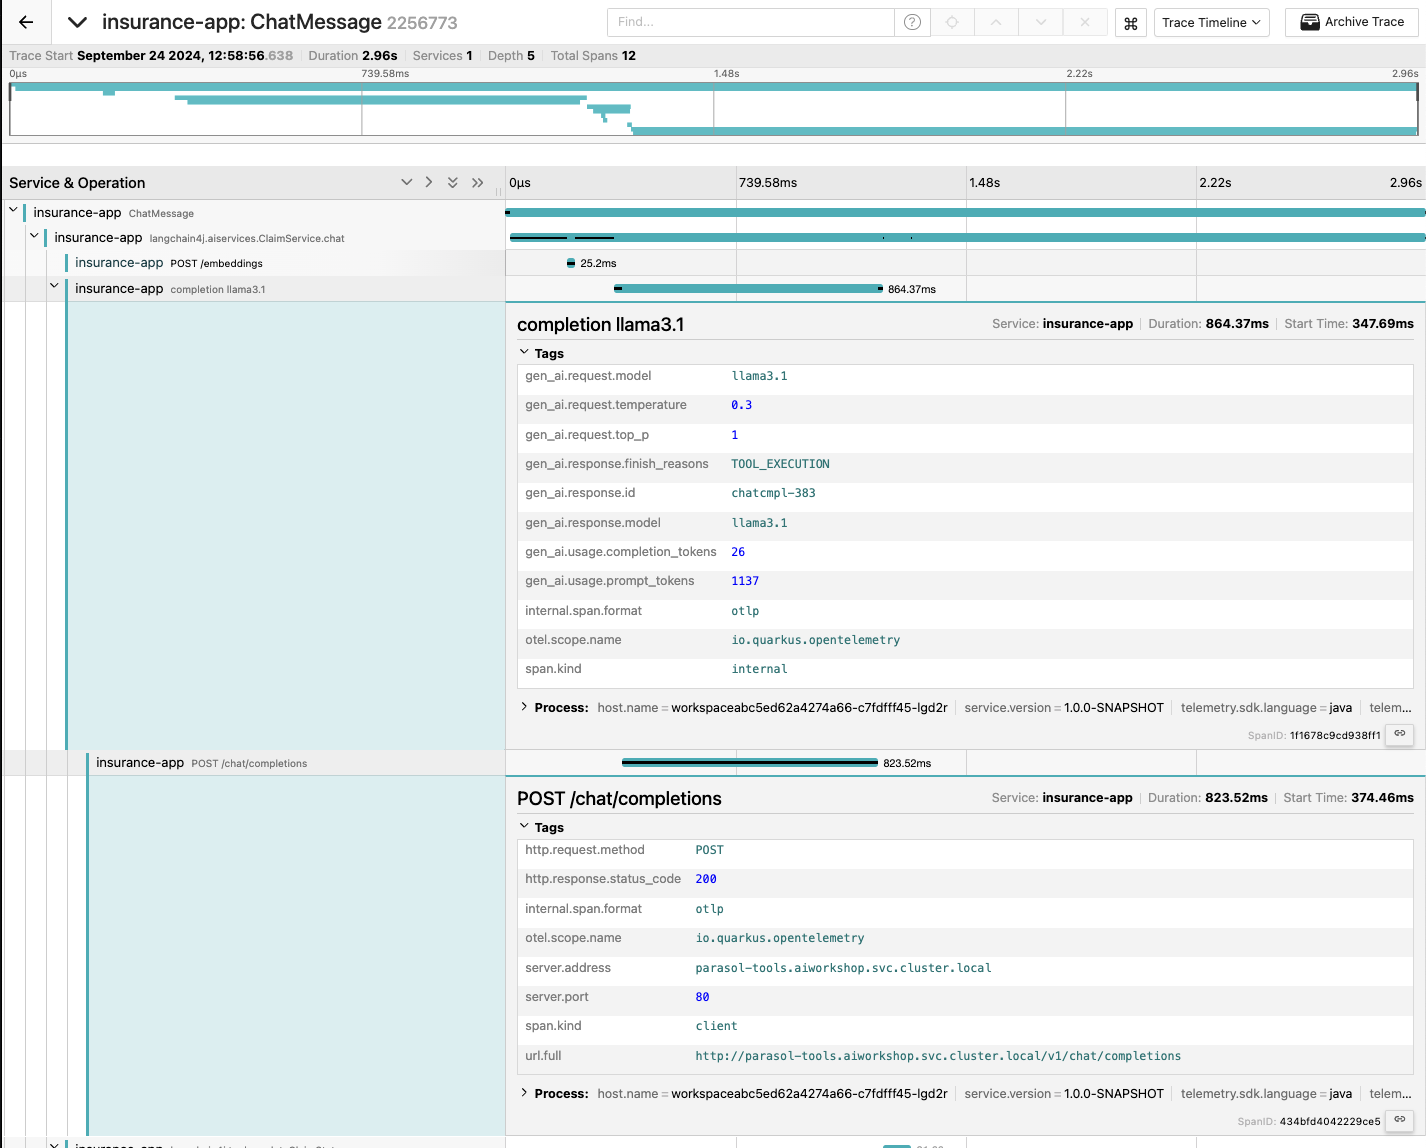
This is all very useful information!
10. Conclusion
We hope you have enjoyed this module!
You can now return to the terminal where Quarkus dev mode is running and terminate the application by using the q key or hitting CTRL-C.
Here is a quick summary of what we have learned:
-
How to load source code into Dev Spaces
-
How to run the chatbot in local development mode
-
What Retrieval-Augmented Generation (RAG) is and how easy it is to use with Quarkus
-
How to enhance a chat bot’s functionality with your own business logic
-
How to observe and debug the flow of an AI-infused application